Add Imported Computer to user defined Collection
In this example, we will demonstrate how you can add a computer to user defined collection immediately after a computer import.
This can be helpful if your OSD collection has a limiting collection other than the All Systems collection.
The first step is to create a Machine Variable, where the users who import computers, can select the collection the computer is to be added to.
This is done from the Machine Variables interface.
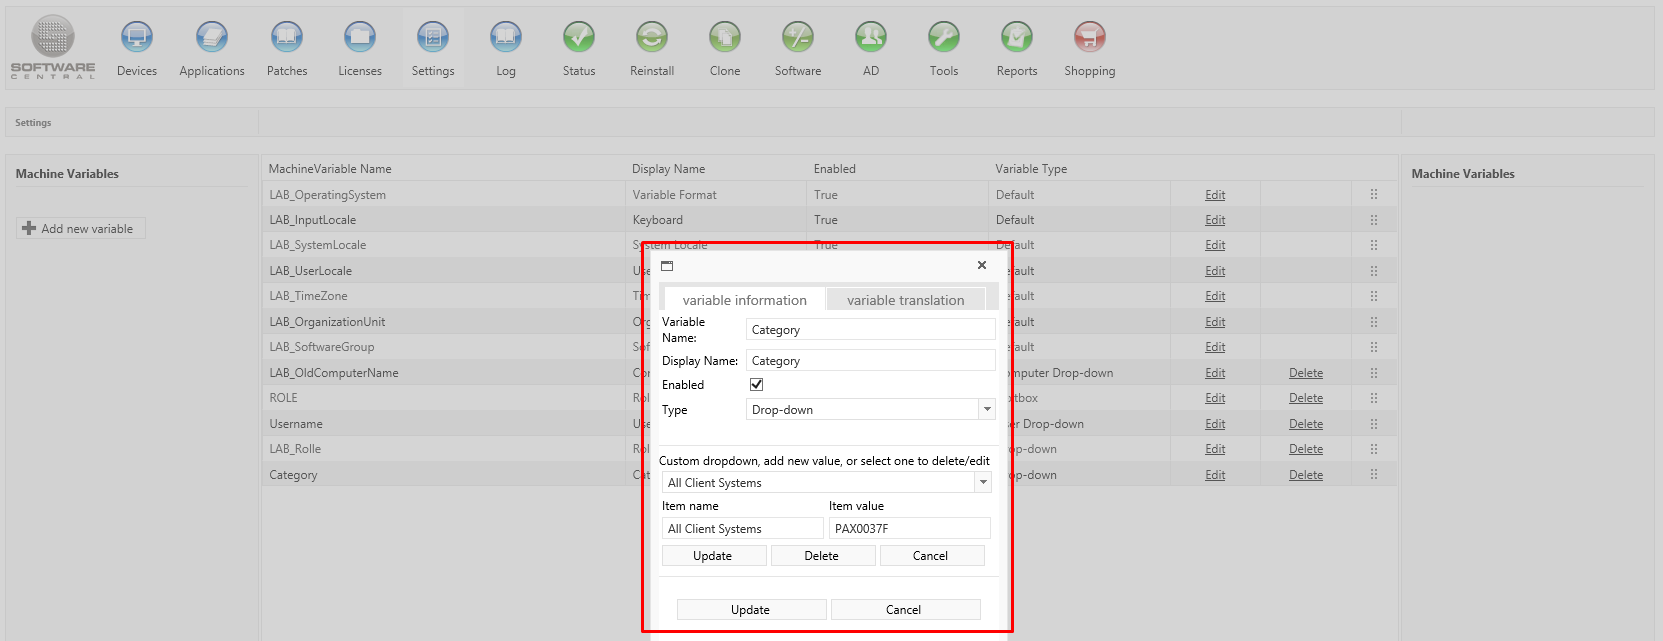
In our example, we have created a Machine Variable named "Category" and defined it as a "Drop-down".
We have added a few values, each representing a collection.
In Item name, we have written the collection name and in Item value we have written the collection id:

We will move the "Category" variable to the top of the Import Computer interface, using the Machine Variables interface:
We can add the new Machine Variable to Computer Templates and make it mandatory. But we will not cover that in this example.
Next we will configure a script to run after a computer has been imported.
Start by creating a new PowerShell script.
Copy the code from the example below to your script.
 |
Remember to change the address for the web service to your own SoftwareCentral address. |
| Import Computer - Add to Collection after import |
Copy Code
|
|---|---|
# Import Computer - Add to Collection after import # # This script adds a newly imported computer to a collection, defined by a Machine Variable. # See how to configure this script in the manual. # # Load parameters: Param ( [int]$ResourceID, [string]$Hostname, [string]$MacAddress, [string]$SMBIOSGUID, [string]$SiteCode ) # Write to the SoftwareCentral log, that the script has started: Write-Host "Launching PowerShell Script after Computer Import for computer: '" $Hostname "'." # Define the MachineVariable Name we want the Value from: [String]$strVariableName = "Category" # The object that will make the call to the Web Service # Change the address to your own SoftwareCentral site address $proxy = New-WebServiceProxy -Uri "http://softwarecentral/Api/WS_Devices.asmx" -Class "Proxy" -UseDefaultCredential # Call the Web Service and get the Machine Variable Value $strVariableValue = $proxy.GetMachineVariable($Hostname,$SiteCode,$strVariableName) if (![string]::IsNullOrEmpty($strVariableValue)) { # If the Machine Variable Value is not null or empty, add the computer to the collection Write-Host $proxy.AddToCollection($Hostname,$strVariableValue,$SiteCode) } |
|
Save your PowerShell script on the server where SoftwareCentral is installed or on a share that SoftwareCentral can read from. Note that you should not add this script to the folder where SoftwareCentral is installed.
Note that this script uses the SoftwareCentral API methods "Devices - Get Machine Variable" and "Devices - Add to collection".
To simplify the setup, you should add the SoftwareCentral application pool user to the SoftwareCentral Administrators Group. If you do not do this, you must grant access to each web service for the application pool user.
See Web Service Security for more information on how to allow access for users, that a not members of the SoftwareCentral Administrators Group.
Now we must configure SoftwareCentral to call the script after computer imports.
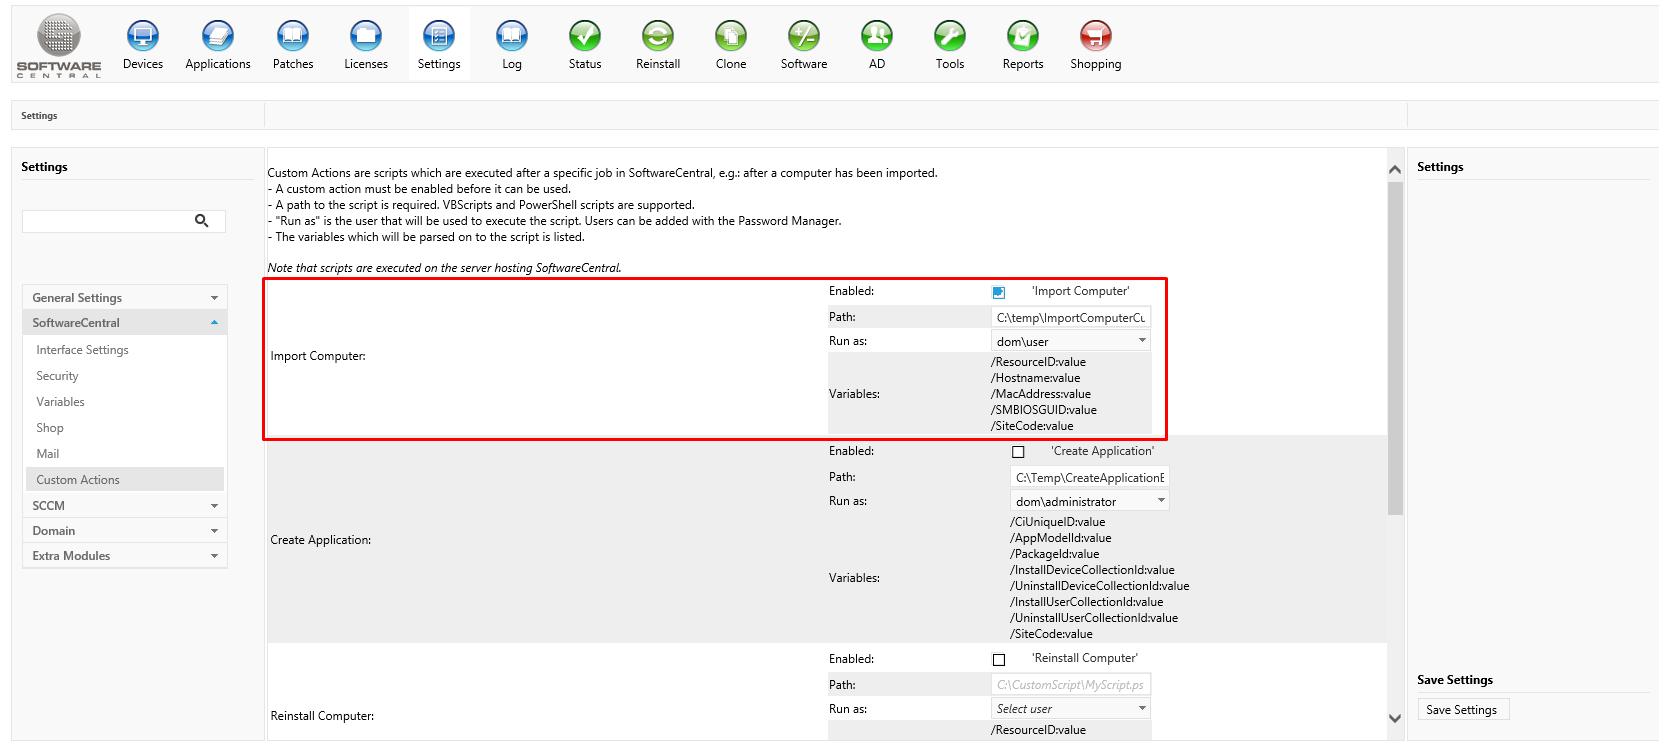
Go to Settings in SoftwareCentral and go to the "SoftwareCentral" menu in the left and select "Custom Actions".
Under "Import Computer", check the "Enabled" checkbox.
Enter the path to your PowerShell script.
Under "Run as" you must set the application pool user. It will not work with any other user.
Now your setup is ready. Go to Import Computer. You should now see the new "Category" variable:
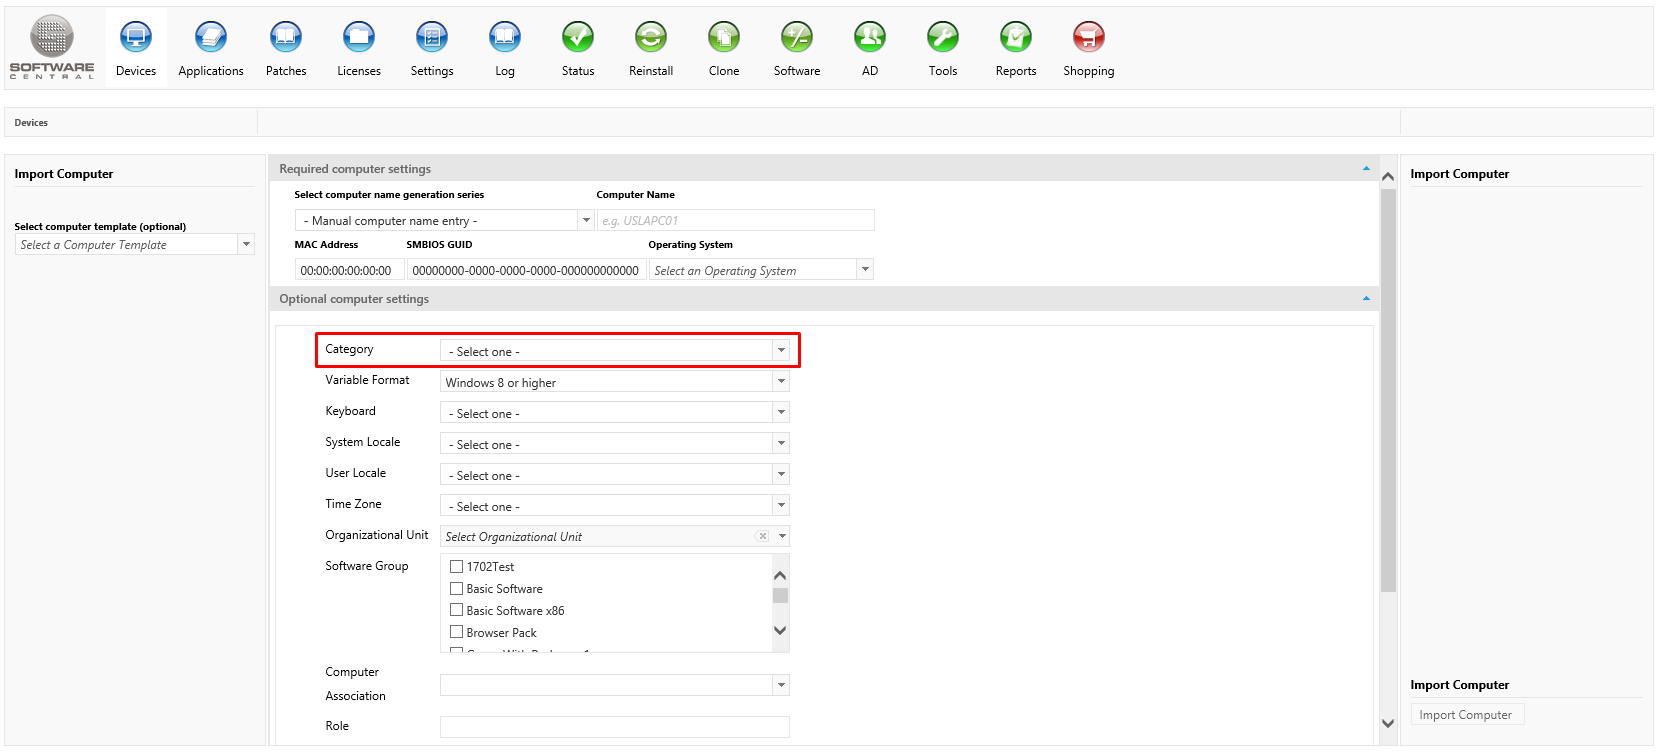
Import a computer and select a collection in the Category drop-down.
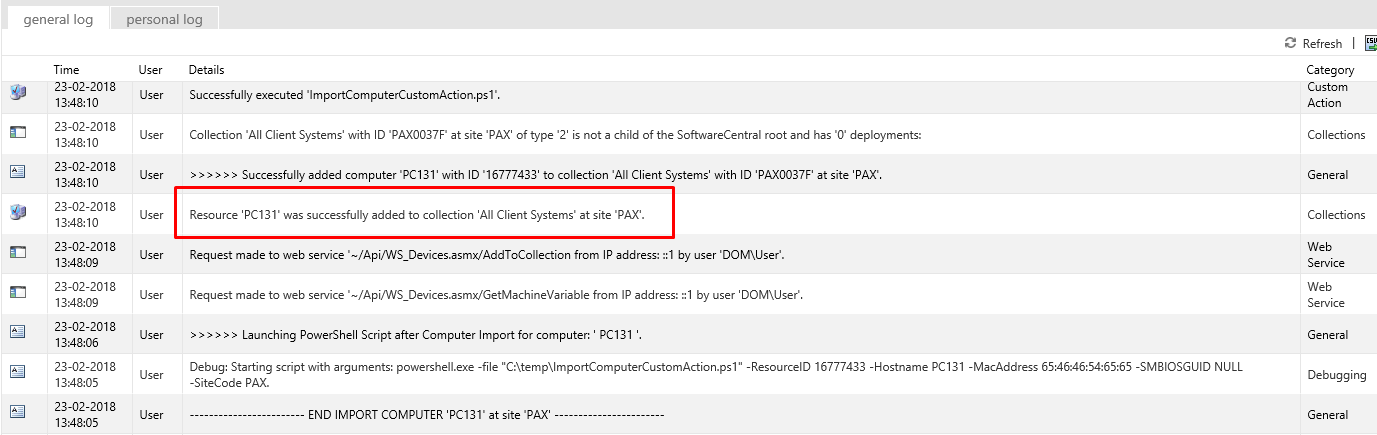
You will now see in the SoftwareCentral log, after the computer has been imported, that it is added to the selected collection: