
Create Multiple Applications
| Interfaces > Applications > Create Multiple Applications |
SoftwareCentral offers a function to create many applications at the same time. Simply copy all source files to your share, select the path in SoftwareCentral and click import.
There are two ways to use this function.
1. SoftwareCentral can automatically detect files, names, detection methods and so on for each application. This function is however only supported my MSI applications.
2. You can add a XML file containing all the information needed for one or more applications and let SoftwareCentral handle the creation of applications, collections, deployments and so on completely by your specifications.
If everything is set up correctly, SoftwareCentral will be able to import around 250 applications per hour. (Depending on your hardware this time may vary.)
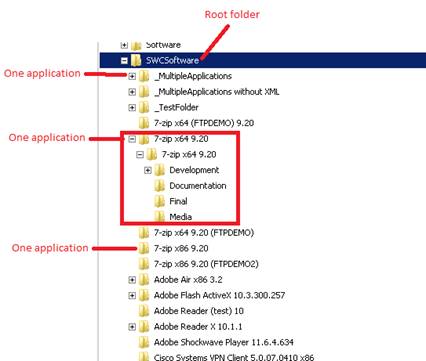
For the auto detection method to work, you first need to copy all your application source files to the defined package share.
Each “sub folder” will be considered as a separate application:
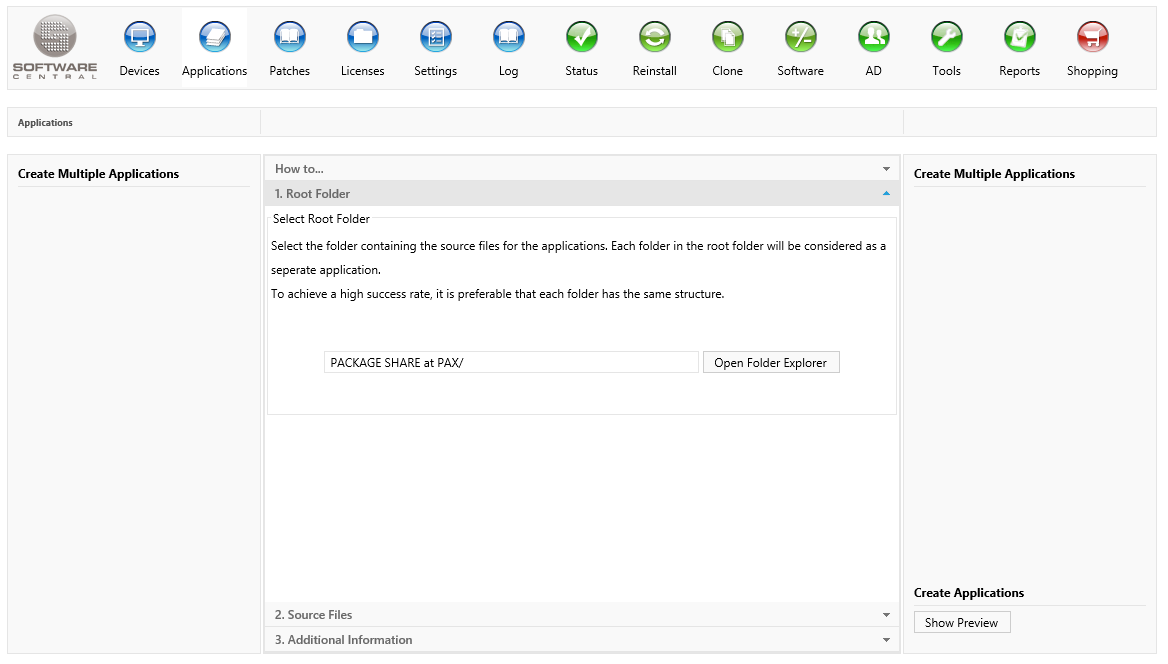
Go to “Create Multiple Applications” in SoftwareCentral and select the folder containing all your applications:
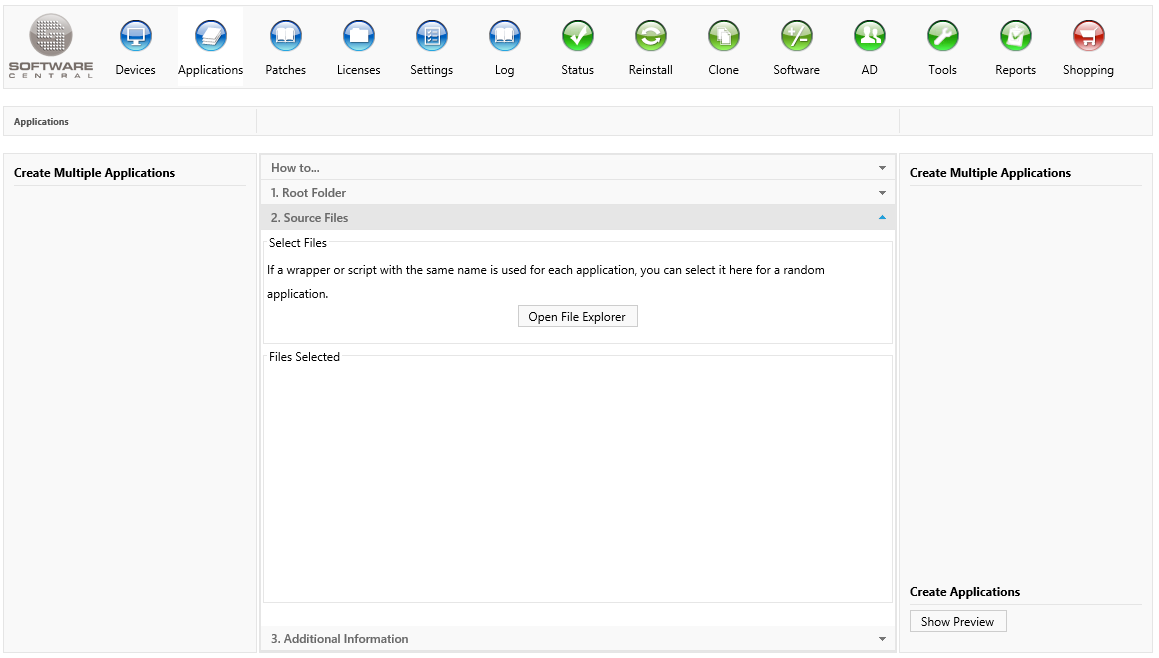
SoftwareCentral is now ready to process the files and show a preview. If your MSI files are standardized with a special name, you can give SoftwareCentral an example application in “2. Source Files”:
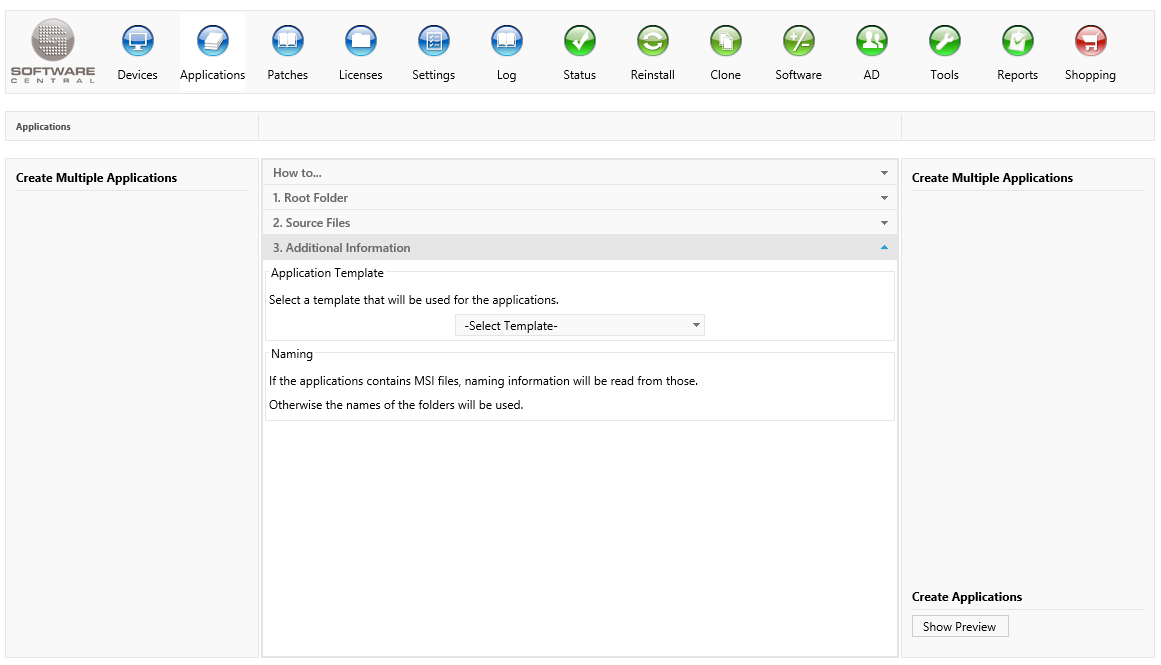
Finally you can select an Application Template which will be applied to every application:
When you click the “Show Preview” button a new window will open with all the detected applications and the ones who failed. Note that this operation may take a while.
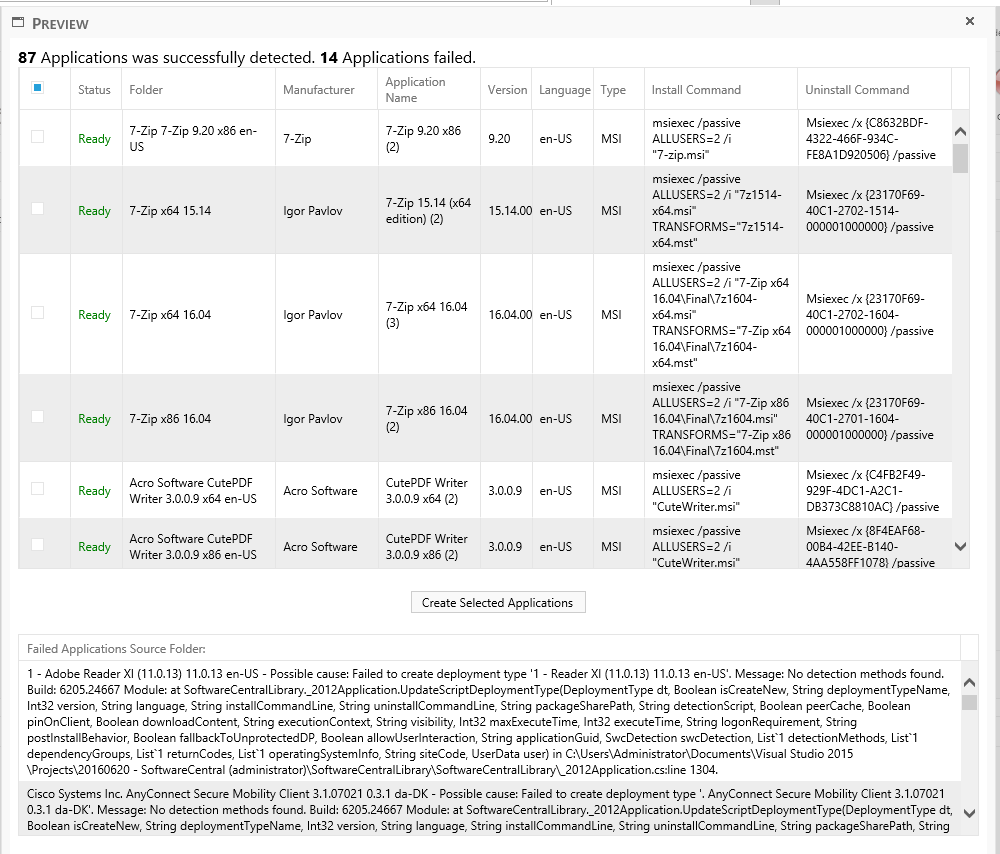
The check boxes to the left allows you to select which applications should be created in the SCCM when you click “Create Applications”. Note that no applications are selected by default.
At the buttom you will se a list of the applications SoftwareCentral wasn’t able to create automatically. If possible, it will write why the creation failed after the name. (The name is the name of the folder where the applications was located)
When you have verified all data, simply click the “Create Applications” button and let SoftwareCentral do the rest.
The operations will be run in the background, allowing you to do other tasks in the meanwhile. (The server and site may have a slower response time while creating applications.
You can follow the progress in of the creation in the log.
If you wish to use an XML file with custom data, then create a XML file named “SoftwareCentral.xml” and place it in each application sub folder (see the figure on page 1).
Note that you can mix applications using the xml file and the ones SoftwareCentral auto detects.
The xml file must be in the following format:
| XML File |
Copy Code
|
|---|---|
<?xml version="1.0" encoding="utf-8"?> <ImportApplication> <Naming> <Manufacturer>SoftwareCentral</Manufacturer> <Name>Test Application</Name> <Version>1</Version> <Language>en-US</Language> </Naming> <DeploymentType> <!--EXE and Script--> <InstallExecutable>_SWCTestApp/0.0.0.1/ApplicationInstaller.exe</InstallExecutable> <InstallExecutableParameters>/Passive</InstallExecutableParameters> <UninstallExecutable>_SWCTestApp/0.0.0.1/ApplicationInstaller.exe</UninstallExecutable> <UninstallExecutableParameters>/Passive /Uninstall</UninstallExecutableParameters> <RepairProgram>_SWCTestApp/0.0.0.1/ApplicationInstaller.exe /Repair</RepairProgram> <!--MSI--> <!--<MsiInstallParameters>msiexec.exe /i "install_flash_player_11_active_x.msi" TRANSFORMS="install_flash_player_11_active_x.mst" ALLUSERS=2 /Passive /norestart</MsiInstallParameters> <MsiUninstallParameters>Msiexec.exe /x {DC48E09D-4E5F-4039-B93A-FCED36EFBE55} /Passive /norestart</MsiUninstallParameters> <ProductCode>{DC48E09D-4E5F-4039-B93A-FCED36EFBE55}</ProductCode>--> <RepairProgram>Msiexec /fvmp {DC48E09D-4E5F-4039-B93A-FCED36EFBE55}</RepairProgram> <DetectionMethod Type="WindowsInstaller"> <ProductCode>{83C3C619-9B4E-4306-8898-4AF6521BC4C3}</ProductCode> </DetectionMethod> <!--<DetectionMethod Type="FileSystem"> <FileOrFolderName>AcroRd32.exe</FileOrFolderName> <IsFile>true</IsFile> <Path>%ProgramFiles(x86)%\Adobe\Reader 10.0\Reader</Path> <Is64Bit>false</Is64Bit> </DetectionMethod> <DetectionMethod Type="Registry"> <RegistryRootKey>HKEY_LOCAL_MACHINE</RegistryRootKey> <Key>SOFTWARE\Microsoft\CCM</Key> <Value></Value> <Is64Bit>true</Is64Bit> </DetectionMethod>--> </DeploymentType> <ApplicationTemplate>TemplateName</ApplicationTemplate> <SoftwareOrderOptions> <ClientInstallAllowed>true</ClientInstallAllowed> <ClientUninstallAllowed>True</ClientUninstallAllowed> <FrientlyPackageName>Test Application</FrientlyPackageName> <Description></Description > <Price>0</Price> <SuperUsers></SuperUsers> <SupportContact></SupportContact> <PrimeContact></PrimeContact> <TechnicalKnowhow></TechnicalKnowhow> <ApplicationOwner></ApplicationOwner> <Categories> <Category>All</Category> <Category>Marketing</Category> </Categories> </SoftwareOrderOptions> </ImportApplication> |
|
The green fields are commented out. They show alternatives, so you can’t add both an EXE file and an MSI file at the same time.