Welcome to the user manual for Intune Applications, a powerful web application that simplifies Intune application management and deployment. This comprehensive manual will guide you through the key functions of creating, editing, and deleting applications using the Intune Applications interface.
To access the Intune Applications interface, follow the steps below:
- Log in to SoftwareCentral.
- Navigate to the "Application" menu located in the main navigation bar.
- Under the "Application" menu, locate and click on the "Intune Applications" option.
- You will be redirected to the Intune Applications interface, where you can manage your applications efficiently.
Creating an Application
The "Create Application" function allows you to quickly create applications in just three simple steps. To create an application, follow the instructions provided in the respective user manual section for "Create Application."
Editing an Application
The "Edit Application" function empowers you to modify the settings and details of an existing application. To edit an application, follow the instructions provided in the respective user manual section for "Edit Application."
Deleting an Application
The "Delete Application" function enables you to remove applications from your web application's database. To delete an application, follow the instructions provided in the respective user manual section for "Delete Application."
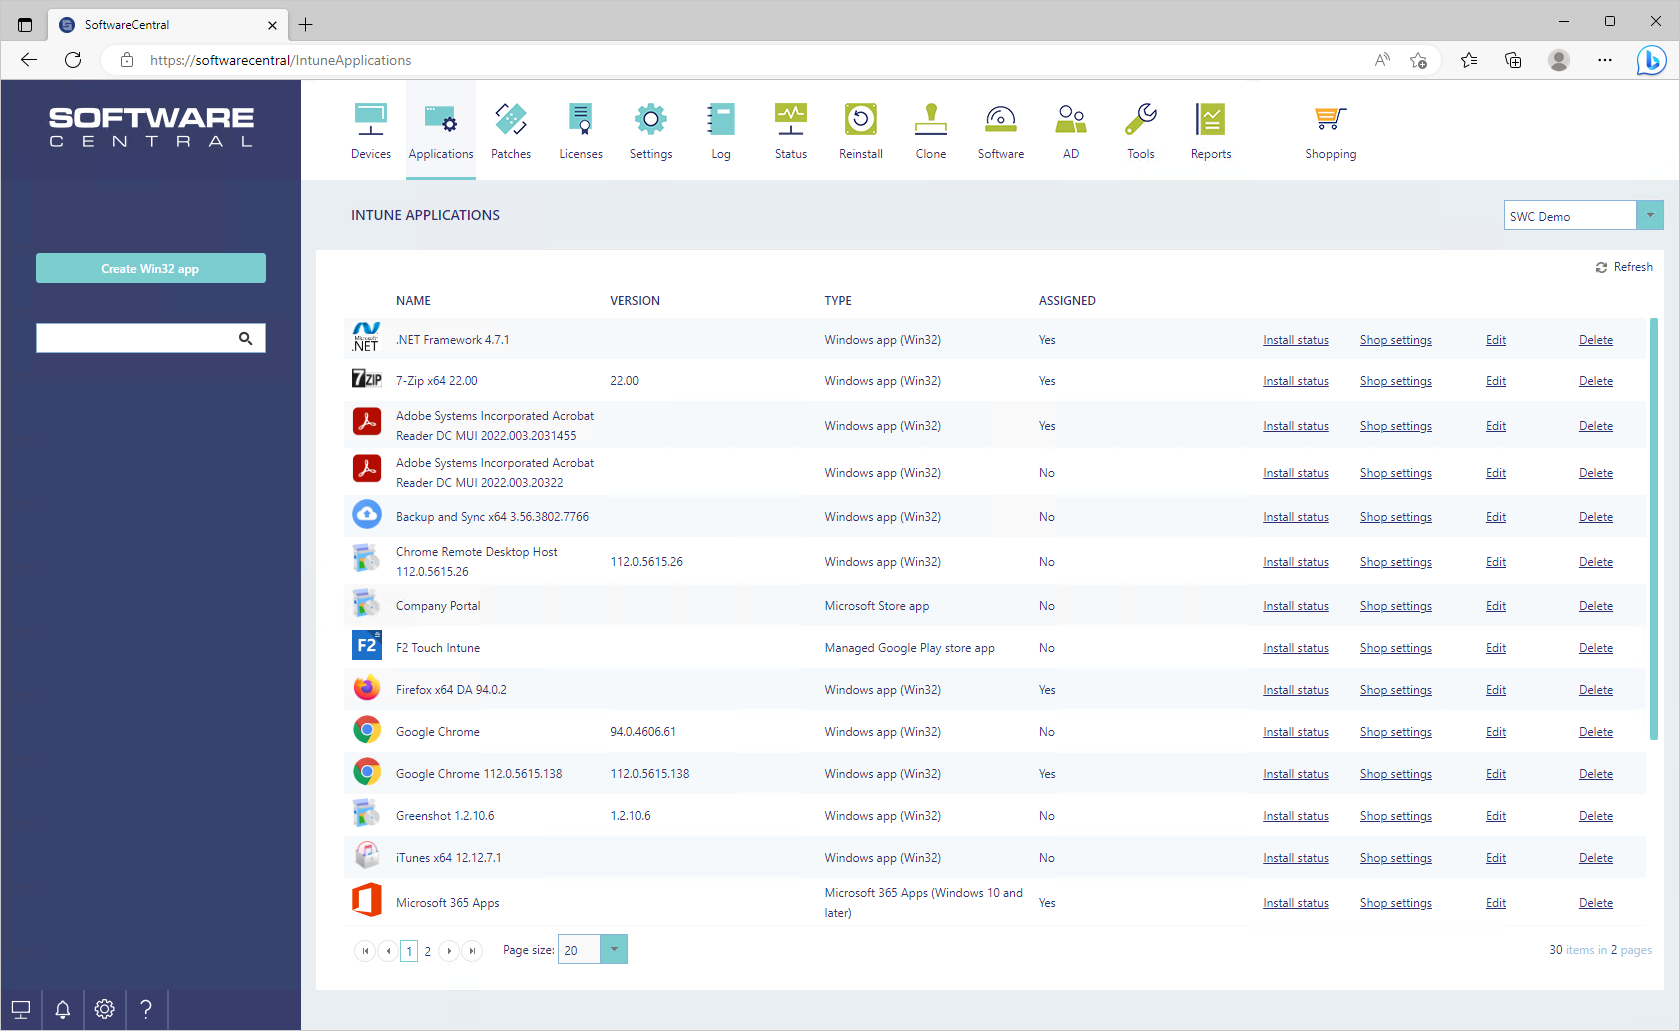
Overview
The application management section with a list of all available Intune applications.
Create Win32 app
The "Create Application" function allows you to easily create an application in just three simple steps. This user manual will guide you through the process.
To access the "Create Application" function, log in to SoftwareCentral and navigate to the Intune Applications section.
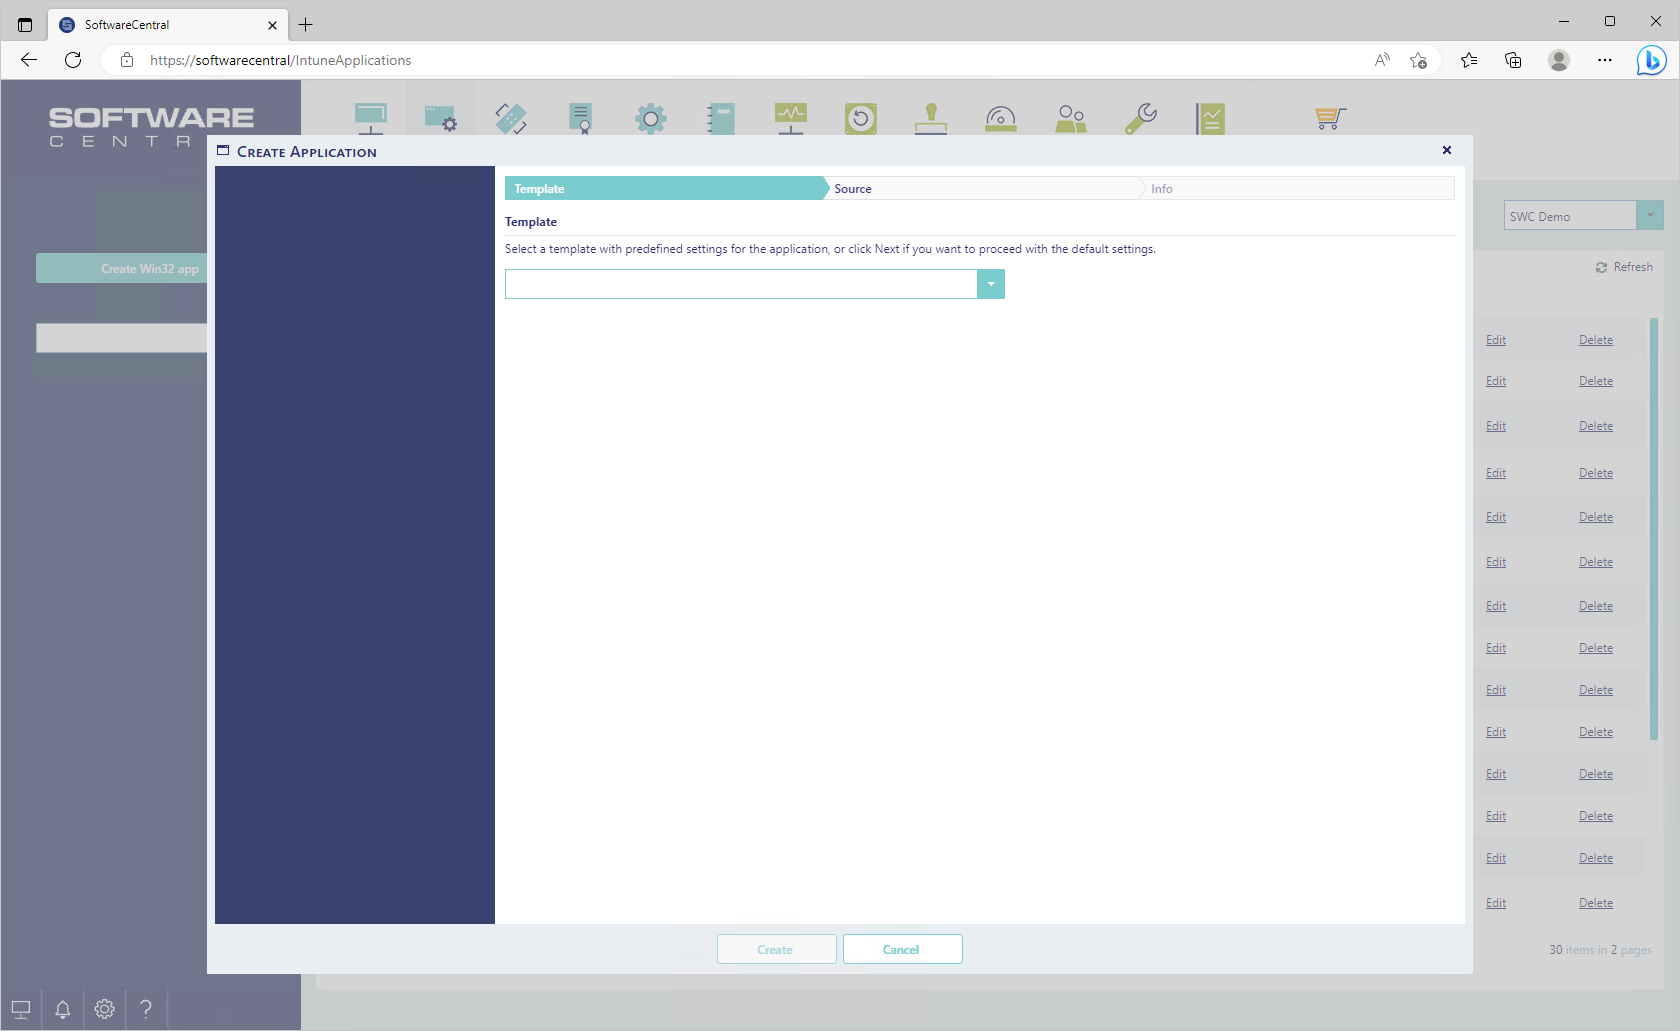
Step 1 - Select a template
In this step, you will select a template with predefined settings for your application. Follow the instructions below:
- Click on the "Create Win32 app" button.
- A list of available templates will be displayed in the drop-down box. Review the templates and select the one that best suits your needs.
- Click on the desired template to proceed.
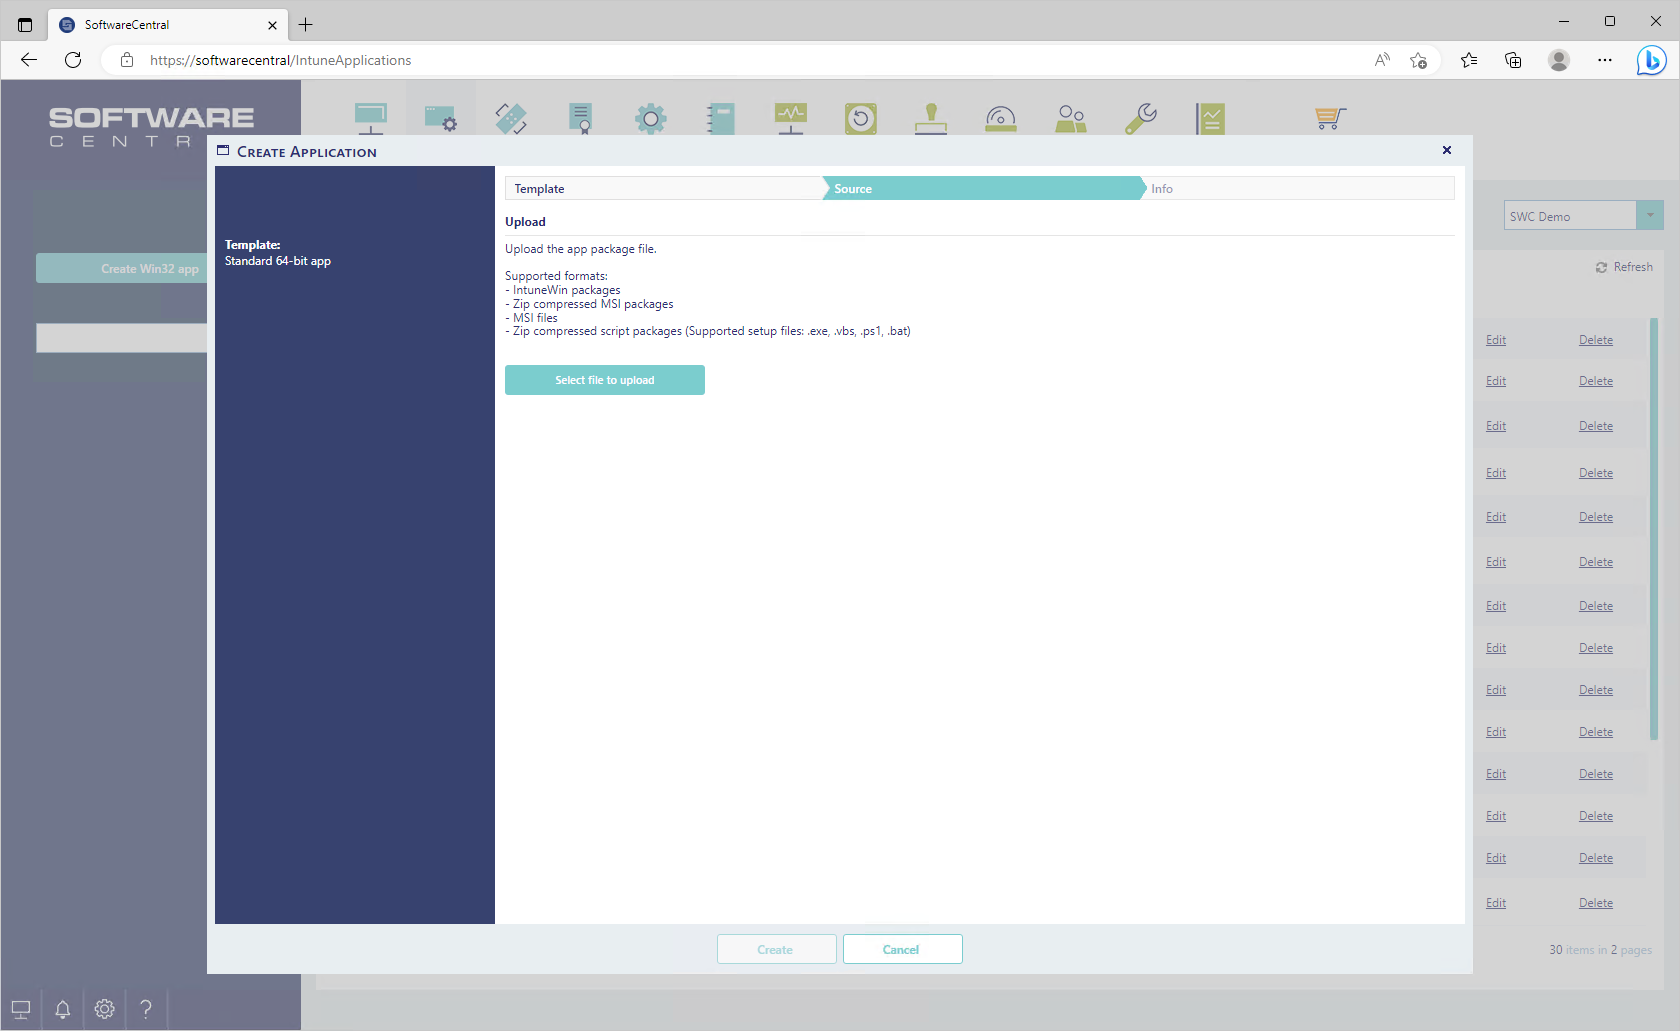
Step 2: Upload Source Files
In this step, you will upload the source files for your application. Ensure that the files you want to upload meet the supported file types. Follow the instructions below:
- Click on the "Select file to upload" button.
- A file selection dialog will appear. Browse and select the files you want to upload.
- Supported file types include:
- IntuneWin
- Zip compressed MSI packages
- MSI files
- Zip compressed script packages (Supported setup files: .exe, .vbs, .ps1, .bat)
- After selecting the file, wait for the files to be uploaded successfully.
Step 3: Auto Fill and Verify Details
In this step, the system will automatically fill in as many details as possible for your application. You may need to interact only if some details are missing. Follow the instructions below:
- Once the file upload is complete, the system will analyze the files and attempt to auto-fill the necessary details.
- Review the auto-filled details and ensure their accuracy.
- If any details are missing or incorrect, manually enter the required information in the provided fields.
- Double-check all the entered information to ensure its accuracy.
- Once you are satisfied with the details, click on the "Create" button to complete the process.
- Your application will be created in the background and will not be immediately available from the application overview.

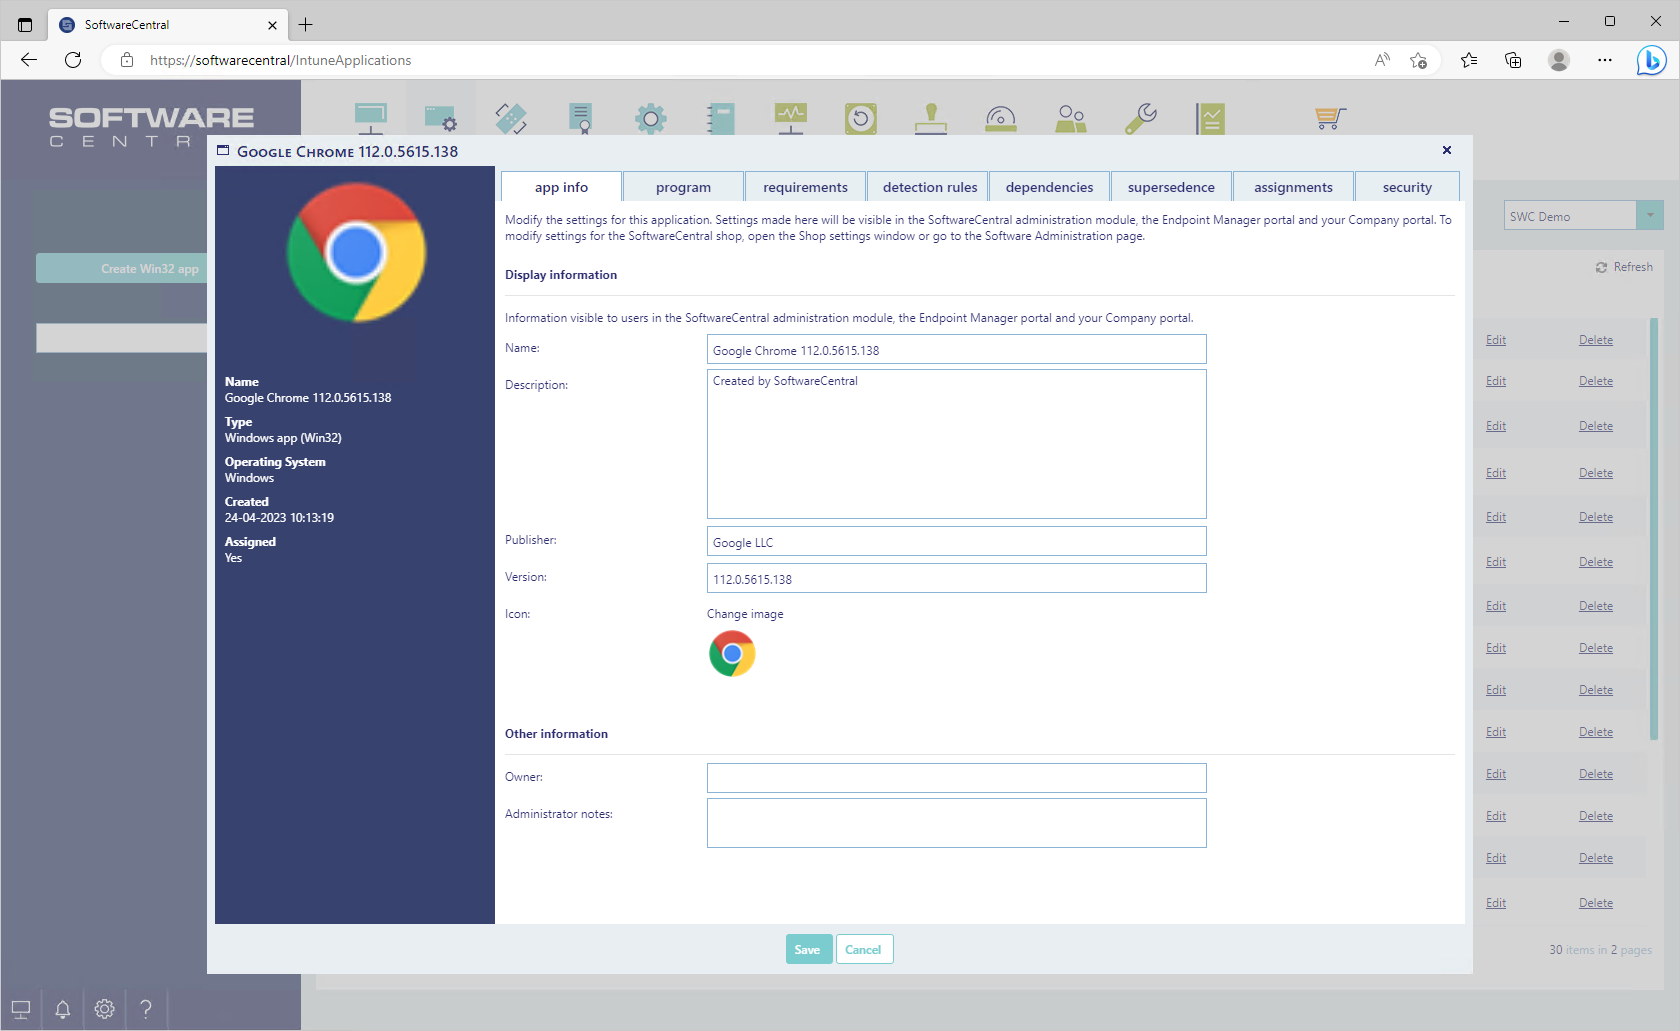
Edit application
The "Edit Application" function allows you to modify the settings and details of an existing application. This user manual will guide you through the process of editing an application.
Step 1: Browse and Select Application
In this step, you will browse and select the application you want to edit. Follow the instructions below:
- From the application management section, locate the desired application you wish to edit.
- Click on the application to open its details page.
Step 2: Edit Application Settings
In this step, you can modify various settings and details of the application. Follow the instructions below:
- On the application details page, locate and click on the application name or "Edit" button to enter the edit mode.
- The page will display different sections representing the various settings and details you can edit. These may include:
- Name: Modify the name of the application.
- Publisher: Edit the publisher information.
- Icon: Change the application icon.
- Program Information: Update program-related details such as version, installation behavior, etc.
- Requirements: Set the system requirements for the application.
- Detection Rules: Define rules for detecting the application's presence on a device.
- Dependencies: Manage any dependencies required by the application.
- Supersedence: Specify whether this application supersedes or is superseded by other applications.
- Assignments: Configure the deployment assignments for the application.
- Security: Set security-related settings, such as access permissions.
- Review and modify the desired settings and details as needed in each section.
- Ensure that all the changes are accurate and complete.
Step 3: Save Changes
In this step, you will save the changes made to the application. Follow the instructions below:
- Once you have finished editing the application settings and details, review all the changes.
- If everything is correct, click on the "Save" button to save the modifications.
- Wait for the changes to be successfully saved.
- You will be redirected back to the application details page, confirming that the edits have been applied.
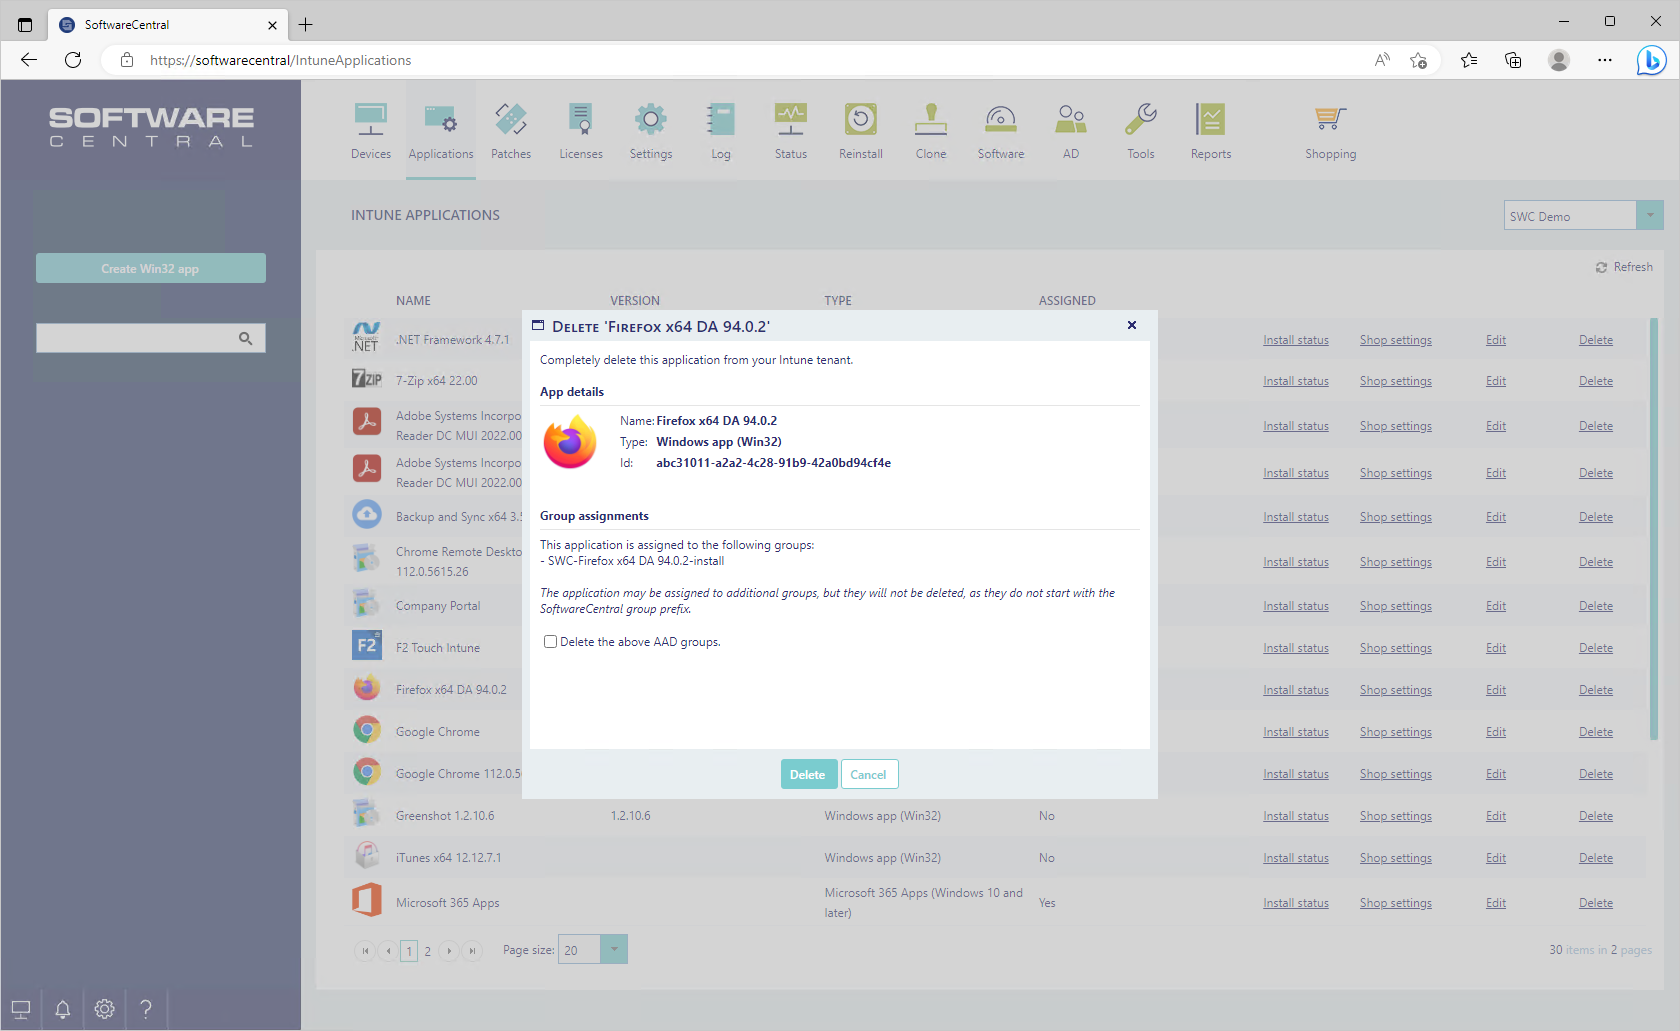
Delete application
The "Delete Application" function allows you to remove an application from Intune and SoftwareCentral.
This user manual will guide you through the process of deleting an application.
Step 1: Select Application to Delete
In this step, you will select the application you want to delete. Follow the instructions below:
- From the application management section, locate the desired application you wish to delete.
- Click on the applications "Delete" button to open its delete page.
Step 2: Review Application Details
In this step, you will review the general information and assigned groups associated with the application. Follow the instructions below:
- On the application delete page, review the information presented, such as the application name and Id to verify the application.
- Look for the section "Group assignments".
- Take note of the assigned groups that are listed. This will help you decide whether you want to delete those groups along with the application.
Step 3: Delete Application
In this step, you will delete the application from Intune and SoftwareCentral. Follow the instructions below:
- Use the checkbox "Delete the above AD groups" to indicate whether you want to delete the associated groups along with the application. Choose the appropriate option.
- Click on the "Delete" button to proceed with the deletion.
- Wait for the deletion process to complete.
- You will be redirected back to the application details page, confirming that the application has been deleted.
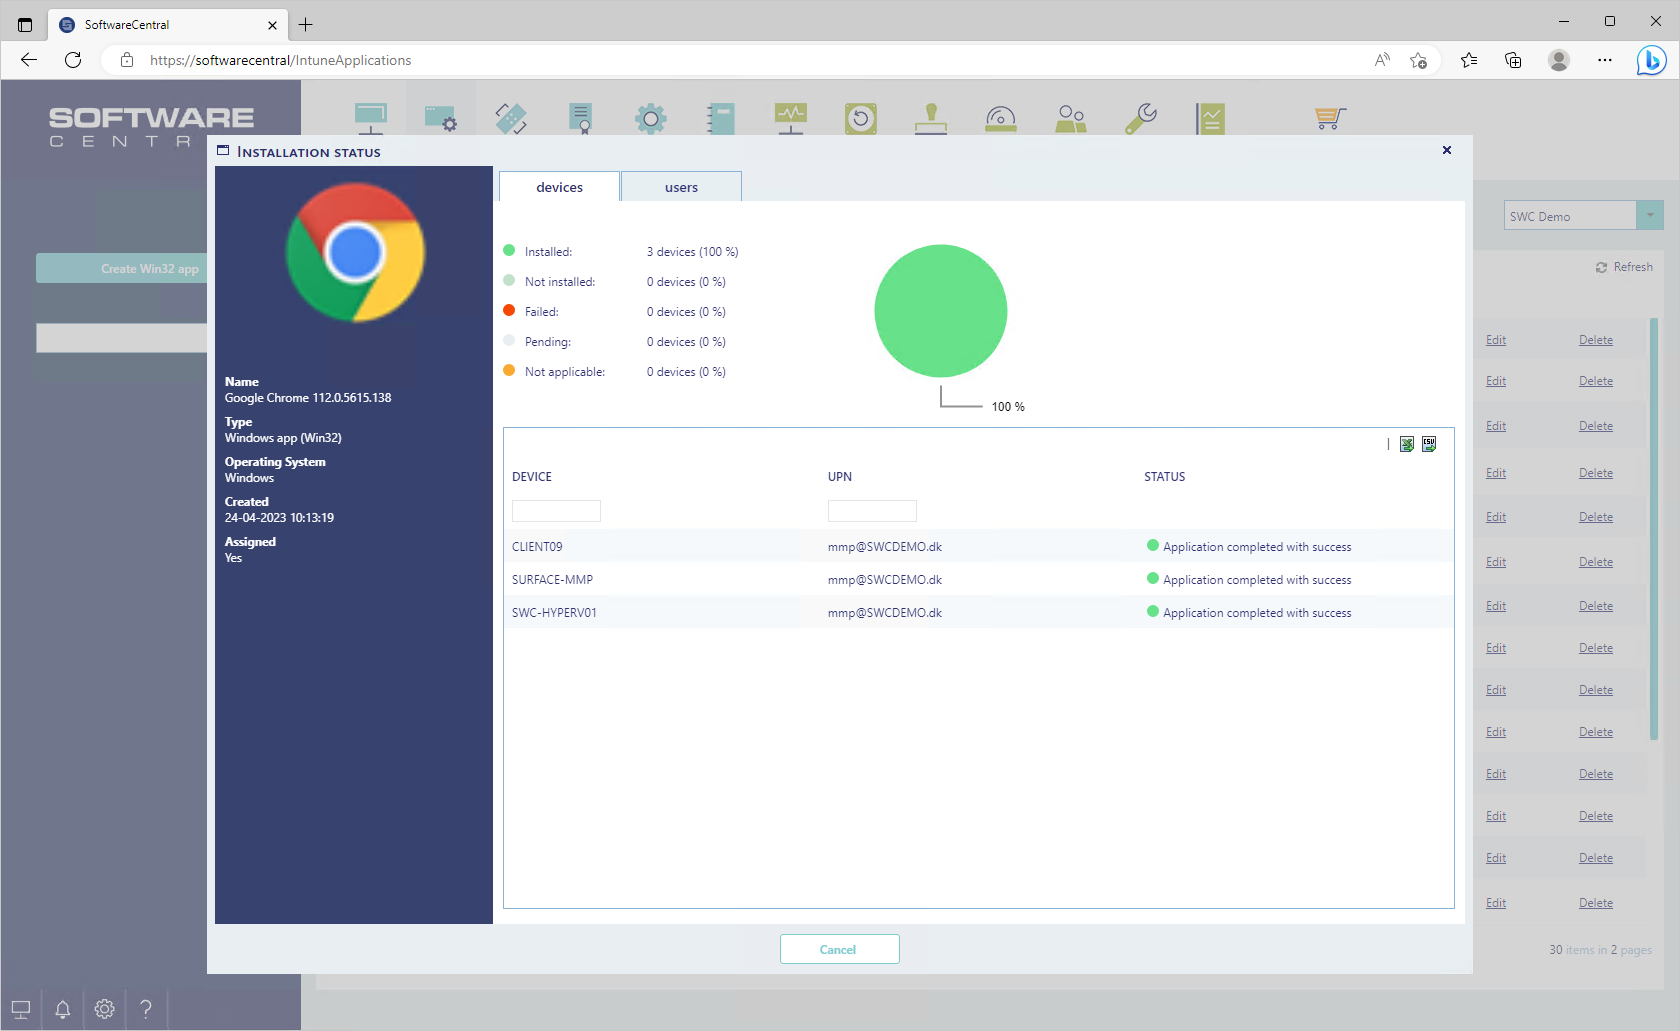
Installation status
The "Installation Status" function provides you with a convenient way to monitor the installation status of applications on devices and users. This user manual section will guide you through accessing and understanding the installation status window.
Accessing the Installation Status Window
To access the Installation Status window, follow the steps below:
- Locate the desired application for which you want to check the installation status.
- Click on the "Install Status" button associated with the application.
- A new window will open, displaying the installation status information for the application.
Understanding the Installation Status Window
Once you have accessed the Installation Status window, you will find information related to the application's installation progress. The window contains the following elements:
-
Pie chart: The pie chart provides a visual representation of the installation status percentages. This chart offers a quick overview of the distribution of installation statuses across devices and users.
- The pie chart is divided into segments, with each segment representing a specific installation status. The size of each segment corresponds to the percentage of devices or users that fall under that particular status. Here's a breakdown of common installation statuses and their possible representations in the pie chart:
- Installed: This status indicates that the application has been successfully installed on the device/user.
- Pending: This status indicates that the application is queued for installation but has not been installed yet.
- Failed: This status indicates that the application installation has encountered an error or failure.
- By referring to the pie chart, you can quickly gauge the overall distribution of installation statuses and identify any trends or discrepancies that may require further attention or troubleshooting.
- Devices tab: This section provides details about the devices the application is assigned to, such as the device name, user principal name, and the installation status.
- Users tab: This section displays information about the users assigned to the application, including the user's name,user principal name, and the number of devices they have with the application installed, failed, etc.
Interacting with the Installation Status Window
- Sort and Filter: Use sorting and filtering options to customize the display of the installation status data. For example, you might sort by user name or filter by device name.
- Export: There are the ability to export the installation status information to the file formats CSV and Excel for further analysis or reporting purposes.
- Close: Click on the "Close" button to exit the Installation Status window and return to the main interface.