
Update Java Using Replace Package
This example demonstrates how to update java on all clients using Replace Package.
In this example, we have already imported the new Java package and tested it on our test machines.
The newer version must be able to update the previous version for this scenario to work.
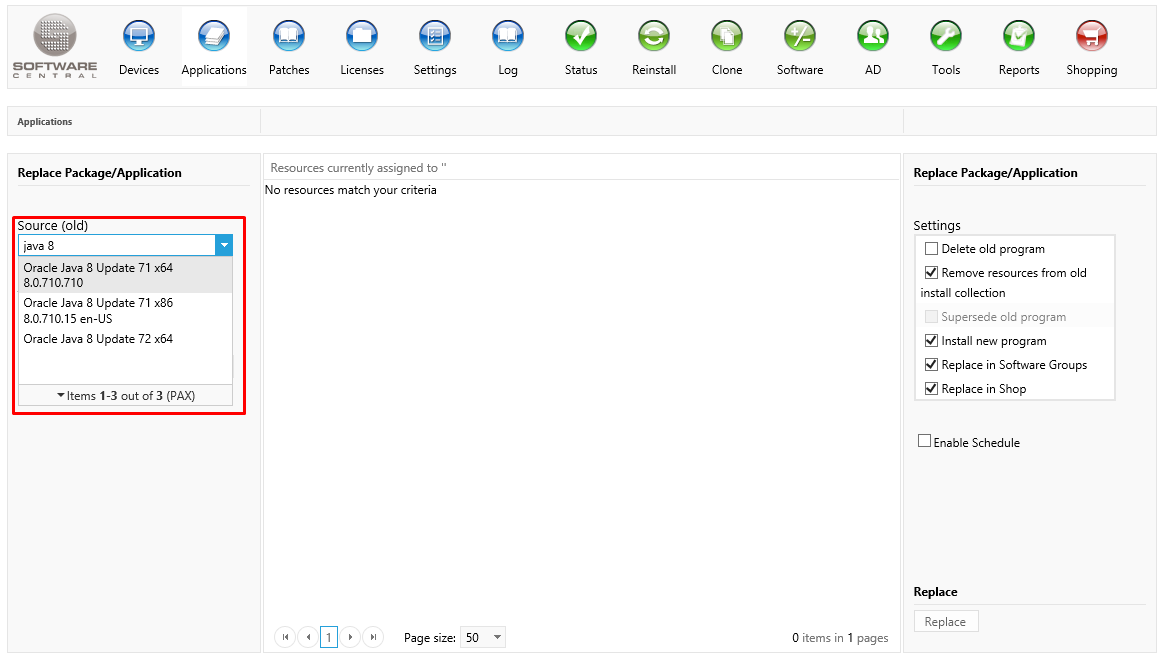
We start by selecting the older version of Java:
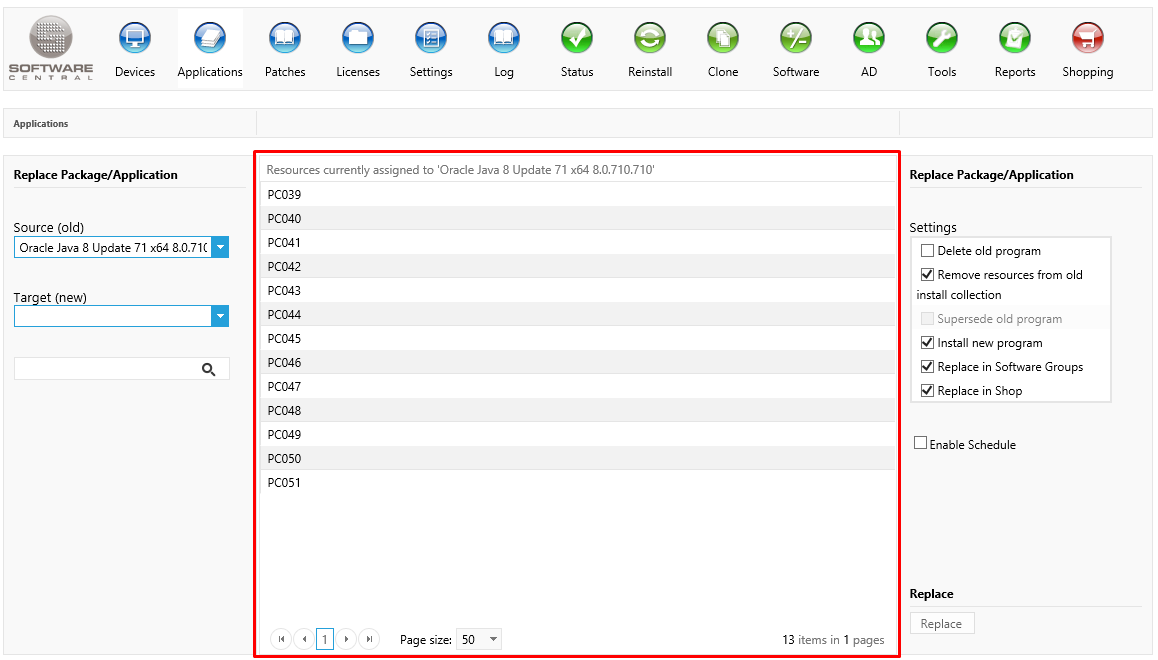
In the center view, we can see the machines which have Java 8 Update 71 deployed. This is also the list of devices which will be updated with the new version.
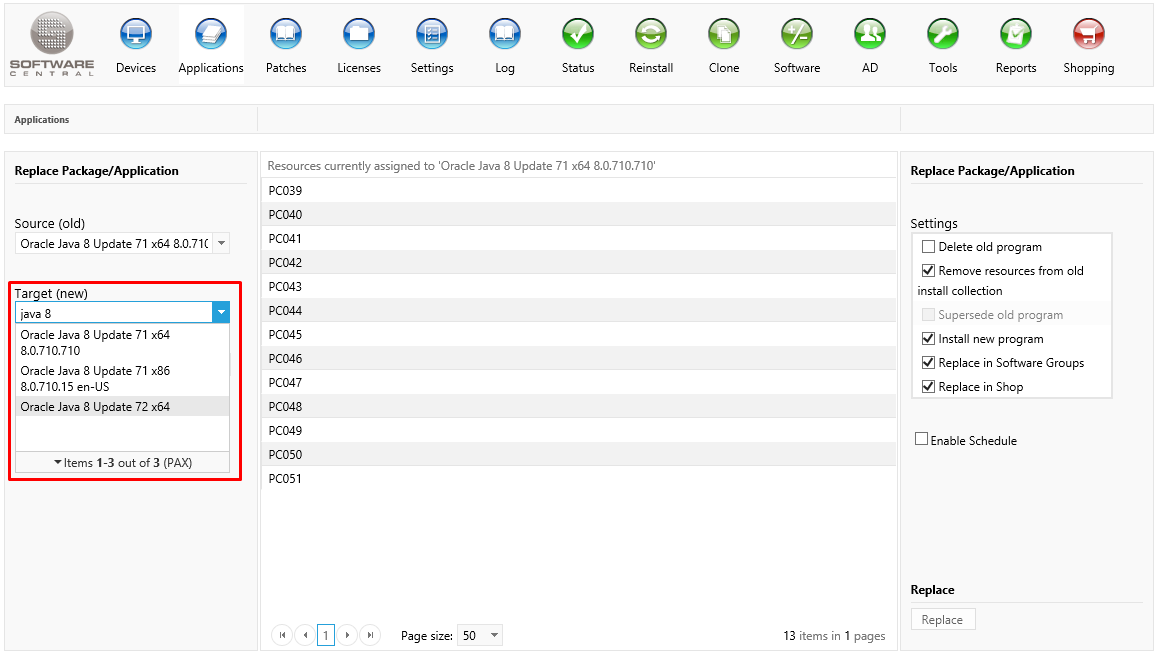
Now we select the new version of Java:
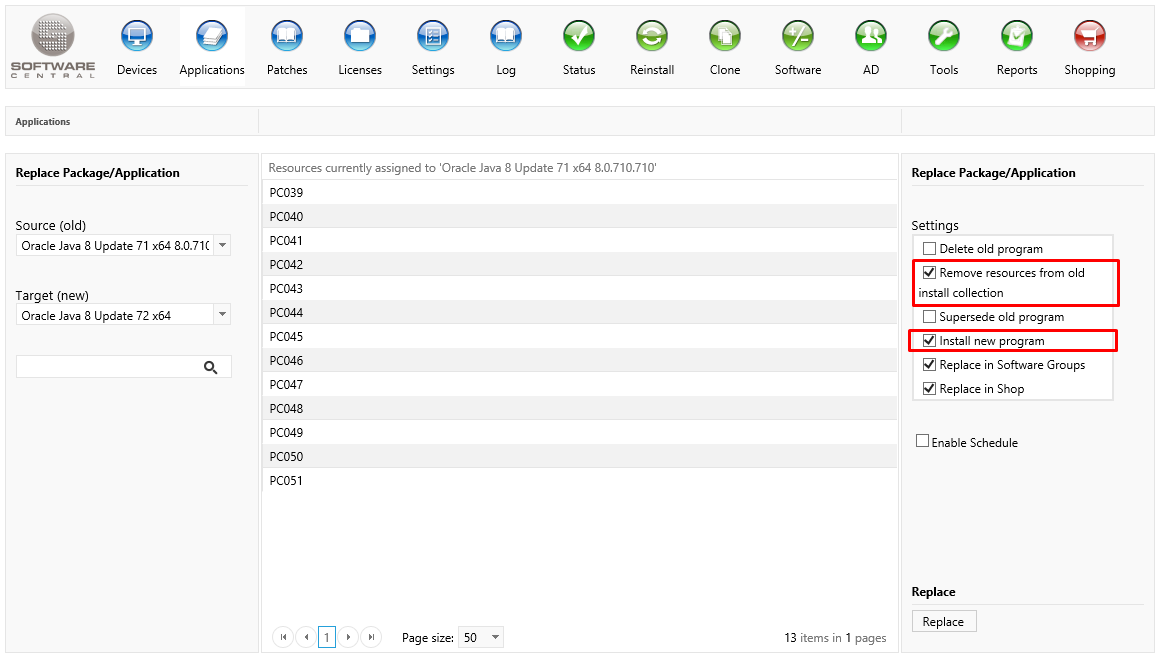
Under Settings in the right menu, we make sure that "Remove resources from old install collection" and "Install new program" is check (default settings).
You can also choose to replace Java in all Software Groups. This will make sure that only the new version is installed during operation system deployments.
We also replace Java in the shop. The new version will then be added to the shop, with the same meta data as the previous version.
By clicking on the Replace button in the lower right corner, Java will now be updated on the selected resources.
It is possible to schedule the replacement for later, using the "Enable Schedule" checkbox. This will only schedule the installation of the new version. The program will be replaced in Software Groups and so forth immediatly.