
Application Wizard
| Interfaces > Applications > Application Wizard |
The Application Wizard in SoftwareCentral is used to import applications into the SCCM. The wizard is found under “Applications/Application Wizard”.

It is a simple wizard in 5 steps that will automatically create the application, the collections, deploy the application to those collections and distribute the content.
 |
Note that the Application Wizard supports predefined settings from an XML file. See the chapter Predefined Application Settings for information on how to create the XML file and where to place it. |
The first page and step is the “Template” step. Select a template if you want to use predefined settings or click the “Next” button if you want to use the default settings.

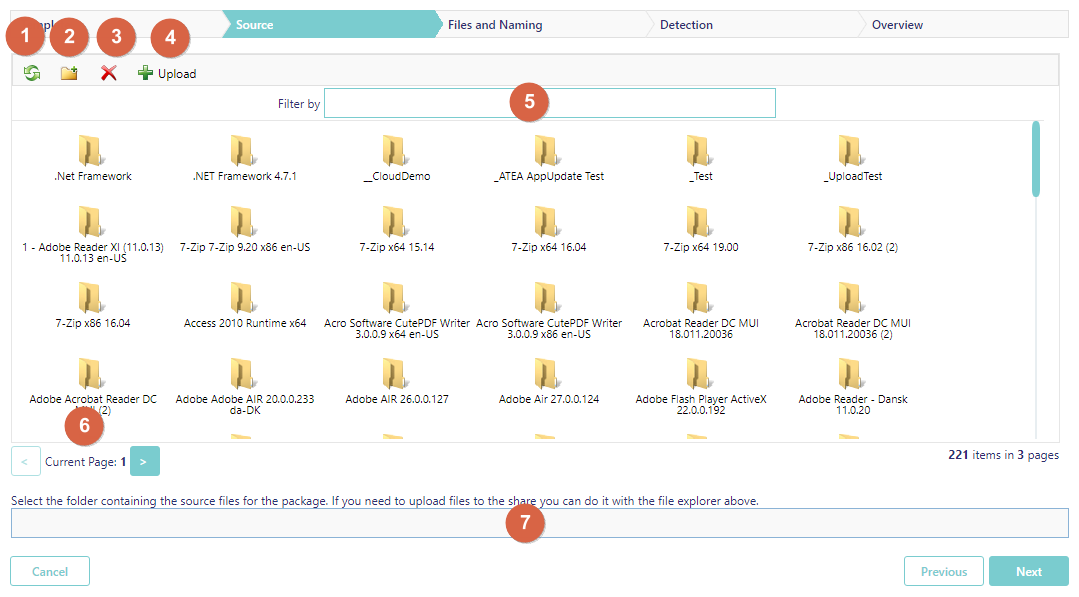
In step 2 you must select the folder where the application root files are located. If the files are not present on the share yet, you can upload them directly in the file explorer.

1. Use the refresh button to refresh the current view - if you for instance have added a new folder using Windows Explorer.
2. Create a new folder.
3. Delete a file or folder.
4. Upload one or more files. The maximum file size allowed is 1 GB. If you upload a zip file, it will automatically get extracted.
5. Search for files and folders in the folder.
6. Only 100 files or folders can be displayed at once. Use the pager to change page or search for the item you are looking for.
7. The path to the selected root folder will be written in this textbox. A folder is selected when it is highlighted or opened.
In step 3 you must select the files used to install the application and name the application.
SoftwareCentral will automatically try to detect the files and the name. If you wish to discard the autosuggestions, click on the "Discard Auto Suggestions" button.
If you wish to read the name from msi file in the source folder, you can click on the "Read name from MSI" button. This will open a new window where you can select which msi the name should be read from.
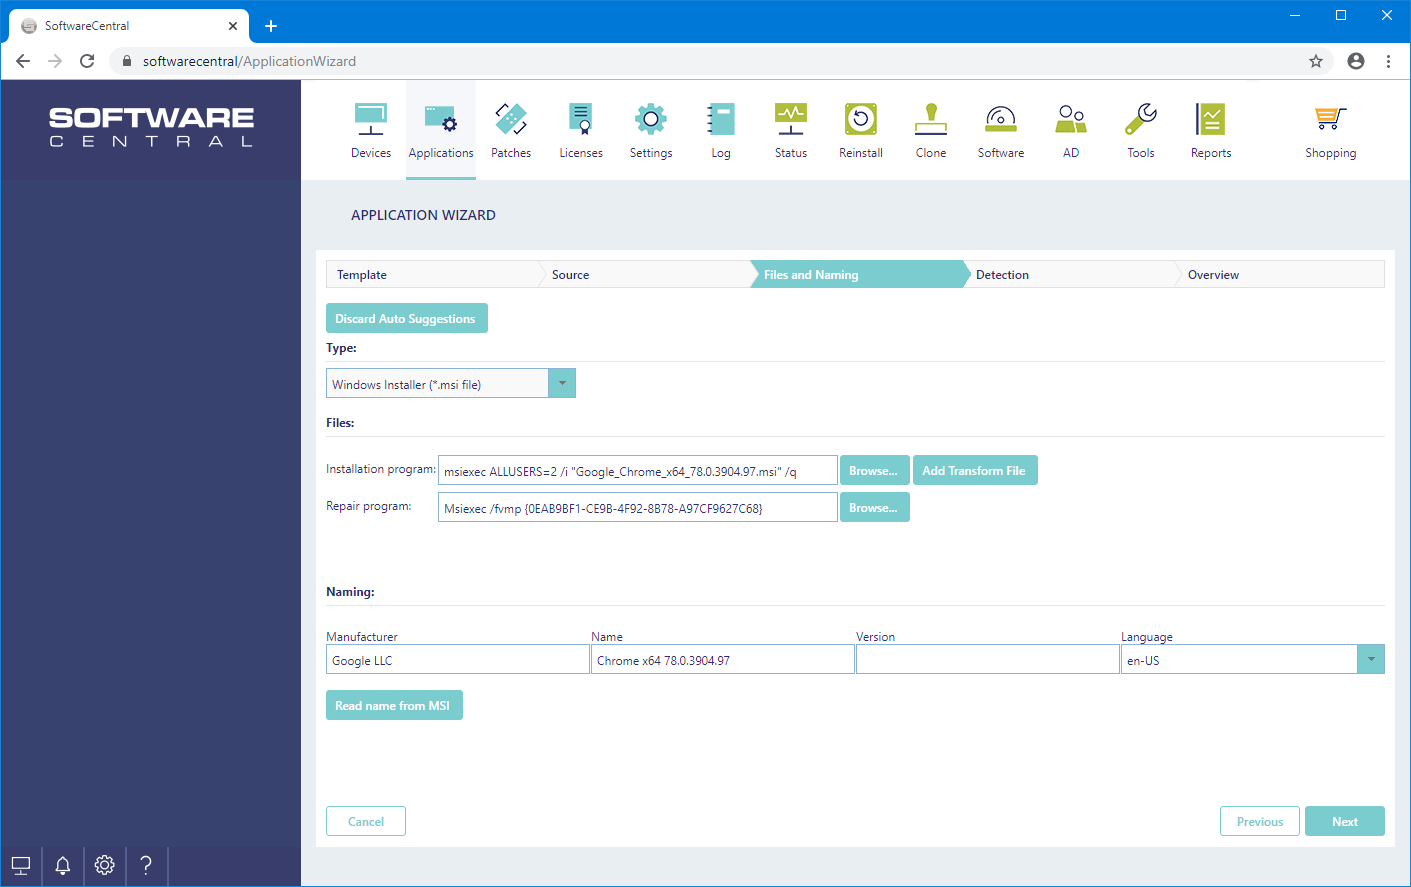
Tip: You can add the name of the application by writing: {manufacturer} {applicationname} {version} {language} in the installation and uninstall program textboxes.
E.g.: If you need the setup process to write to a log with the application name, you can write: “…Logs\{applicationname}.log”.
In step 4 you must define a detection method for the application. SoftwareCentral will, if possible, auto suggest a detection method.
|
App-V packages will skip this step. |
A detection method is required before the application can be created.

In step 5 you get a short overview of what is about to be created. The textboxes which aren't grayed out, can be modified. You can also change the icon for the application as it will be displayed in the SoftwareCentral Shop and in the SCCM Software Catalog.
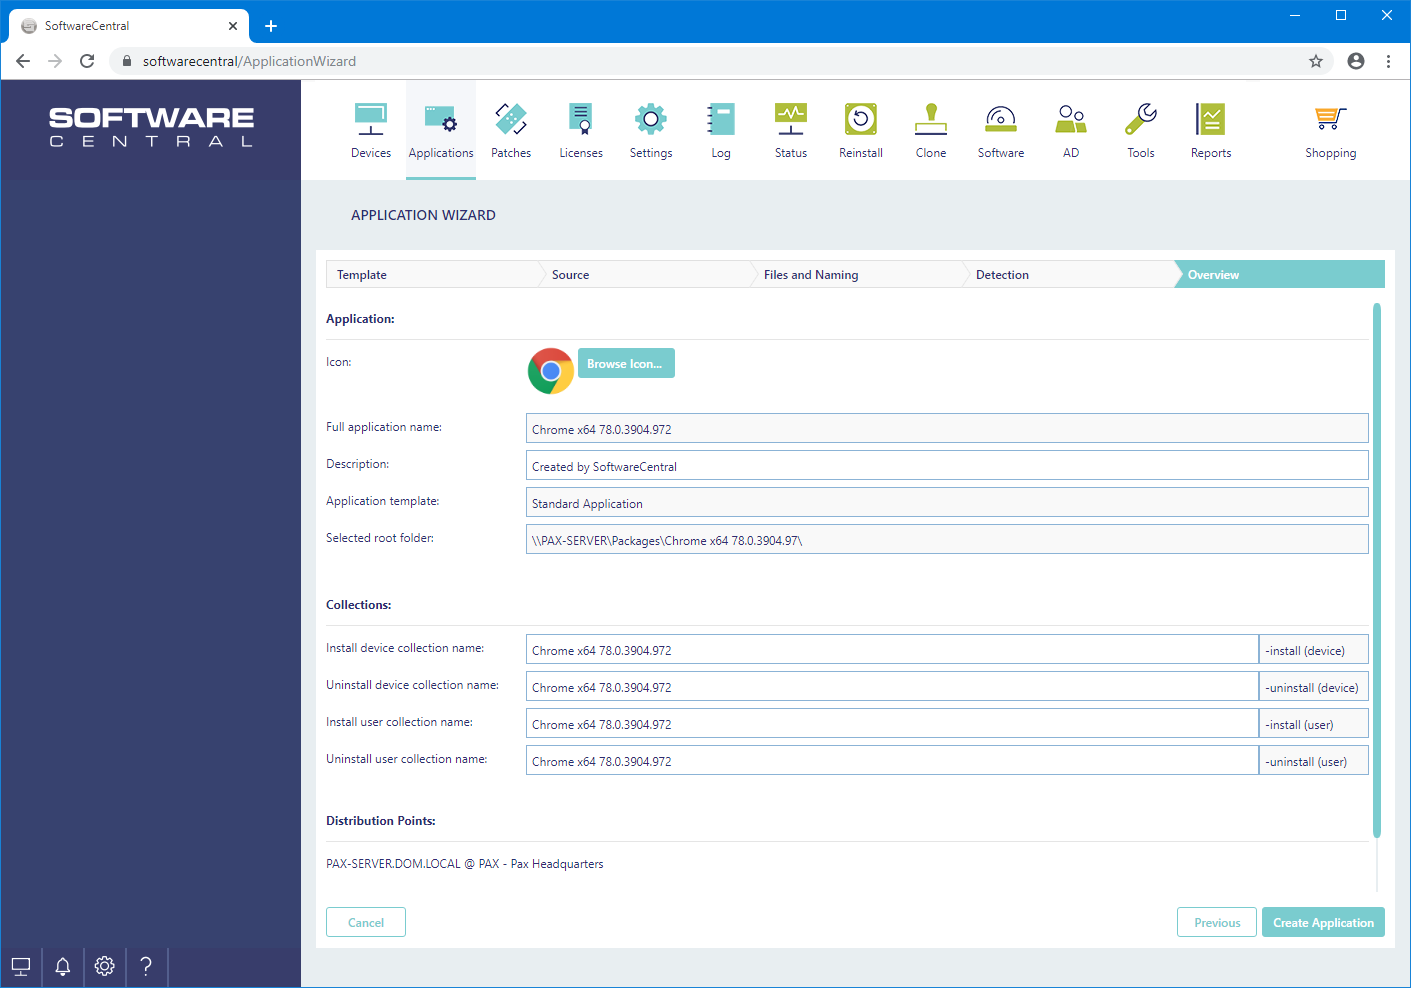
Click on the "Create Application" button to create the application.
Once the application has been created you can go to the Application Management interface to make any advanced setting you may need.