Create Phased Deployment
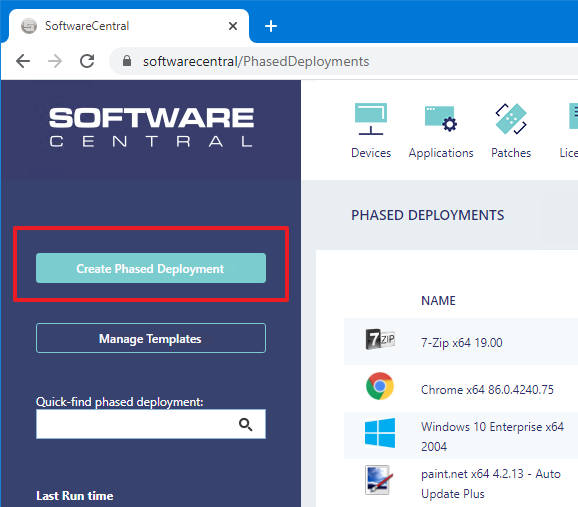
To create a Phased Deployment, click on the "Create Phased Deployment" button in the left menu.
A new window will open:
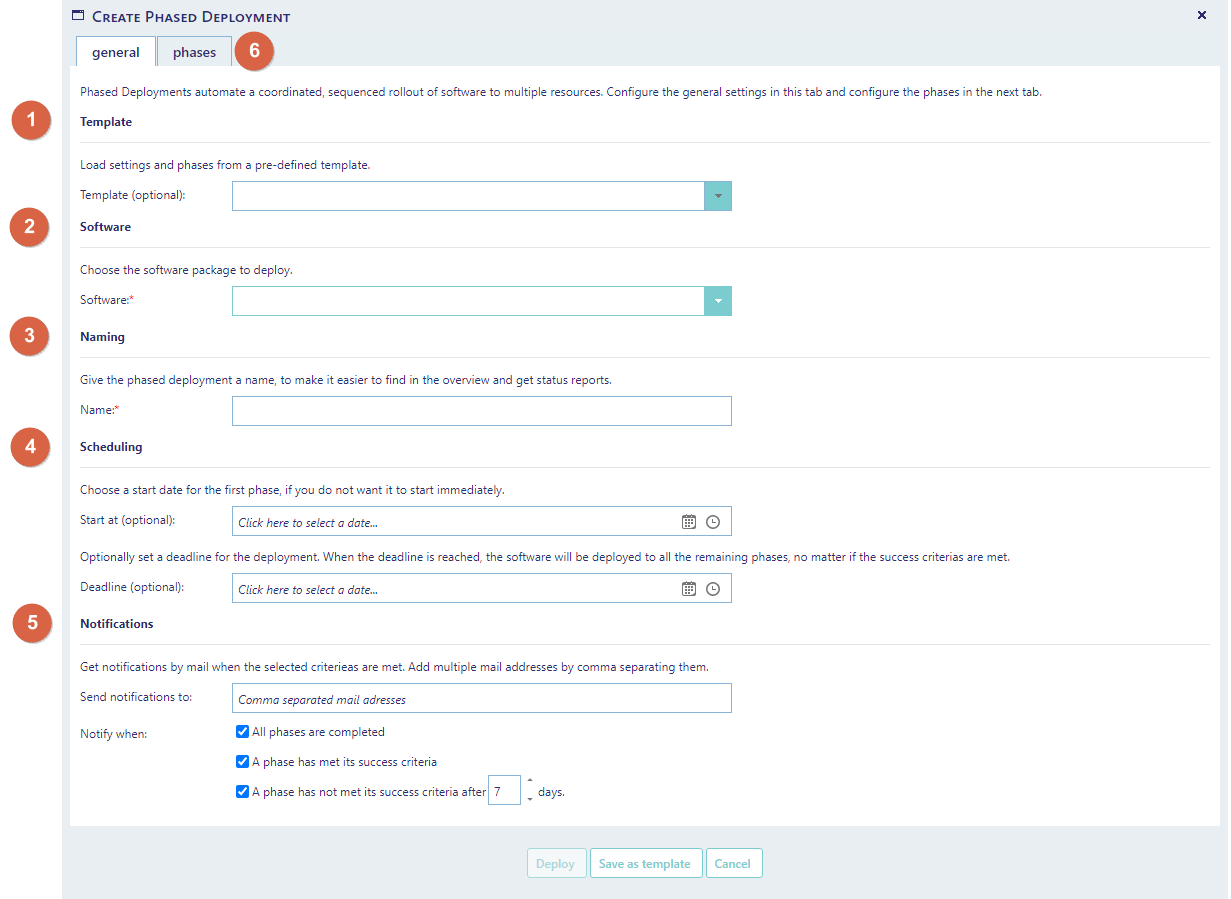
Select a template to load predefined settings and phases. This option is optional.
To learn more about how to create and manage templates, go to Phased Deployments Templates.
Choose the software to deploy. You can choose between packages, applications, application groups and task sequences.
The Phased Deployment requires a name. The name must be unique and less than 256 characters.
If the deployment should not start immediately set a start date and time in the "Start at" field.
You can also configure a deadline for the Phased Deployment. When the deadline is reached, the selected software will be installed on all devices in all phases.
You can get notifications my mail with statuses for this deployment. You can add more than one mail address by comma seperating the mail addresses.
You can get notifications when:
- All phases are completed
- A phase has met its success criteria
- A phase has not met its success criteria after x days
There will also me sent a mail notification when a phase requires approval. This cannot be disabled.
Click on the "phases" tab to add phases to the deployment.
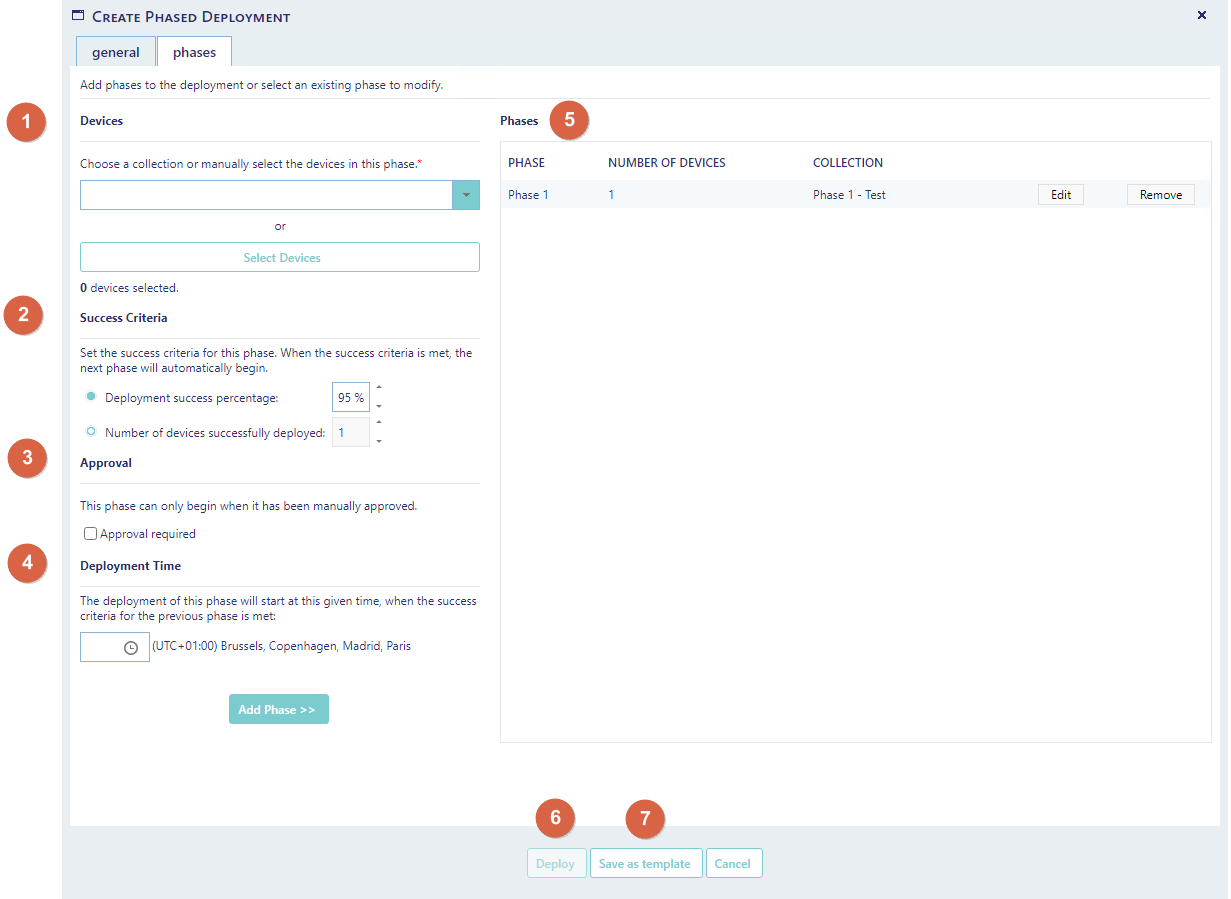
The Phases tab is divided into two parts. To the left, you fill in the details for a phase. To the right, you can see the phases already added.
There are two options to select the devices in a phase.
Use the drop-down to select a collection. The devices from the collection will be added to the selected software install collection. Nothing will get deployed to selected collection.
Use the "Select Devices" button to manually select the devices in the phase.
Note that you cannot mix manually selected devices with a collection.
Here you define when a phase is considered a success and the next phase can begin.
You can choose between the deployment success in percentage or select how many devices must be successfully installed.
Choose whether or not this phase requires approval. If a phase requires approval, it will not begin before a user has approved that it can begin.
Use this option to define what time of the day the phase can start.
From this list you can see all current phased added to the Phased Deployment.
Use the Edit button to modify an existing phase.
Use the Delete button to remove a phase.
When the Phased Deployment is ready. Click on the Deploy button.
When you have created your Phased Deployment, you can monitor it from the status window.
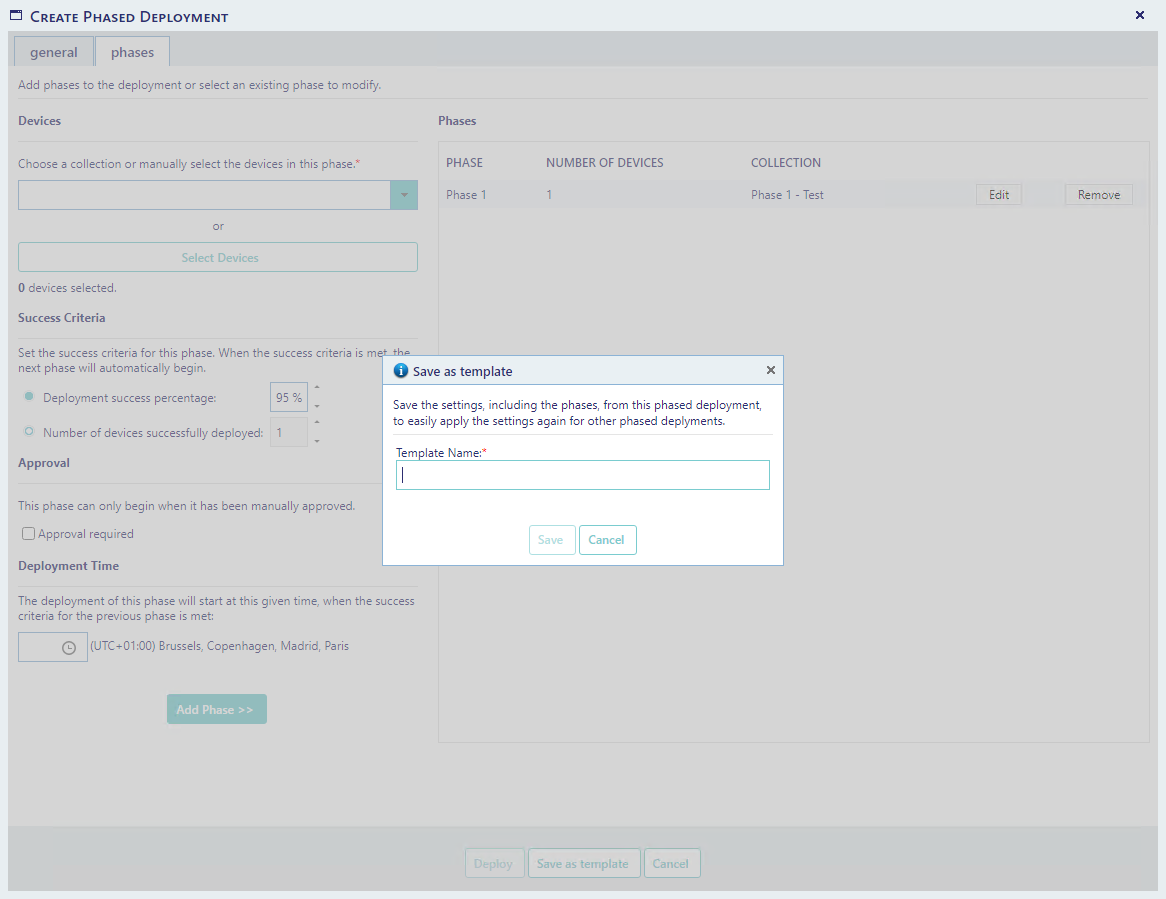
You can save the settings of your current phased deployment as a template, to easily make a similar deployment later.
When you click on the "Save as template" button, a new window will open, prompting you to enter a name for the template.
Once the template has been saved, you can still deploy the Phased Deployment.