
Deployment Plan
A deployment plan is the Deployment Managers way to deploy software and operating systems. You can deploy one or more applications, an operating system to one or more computers or create a phased deployment.
You can schedule your deployment or run it immediately.
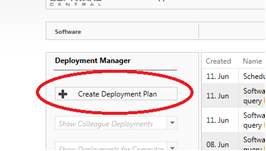
To create a Deployment Plan, click on the “Create Deployment Plan” button:
A new window will open where you can choose between a software deployment and an operating system deployment:
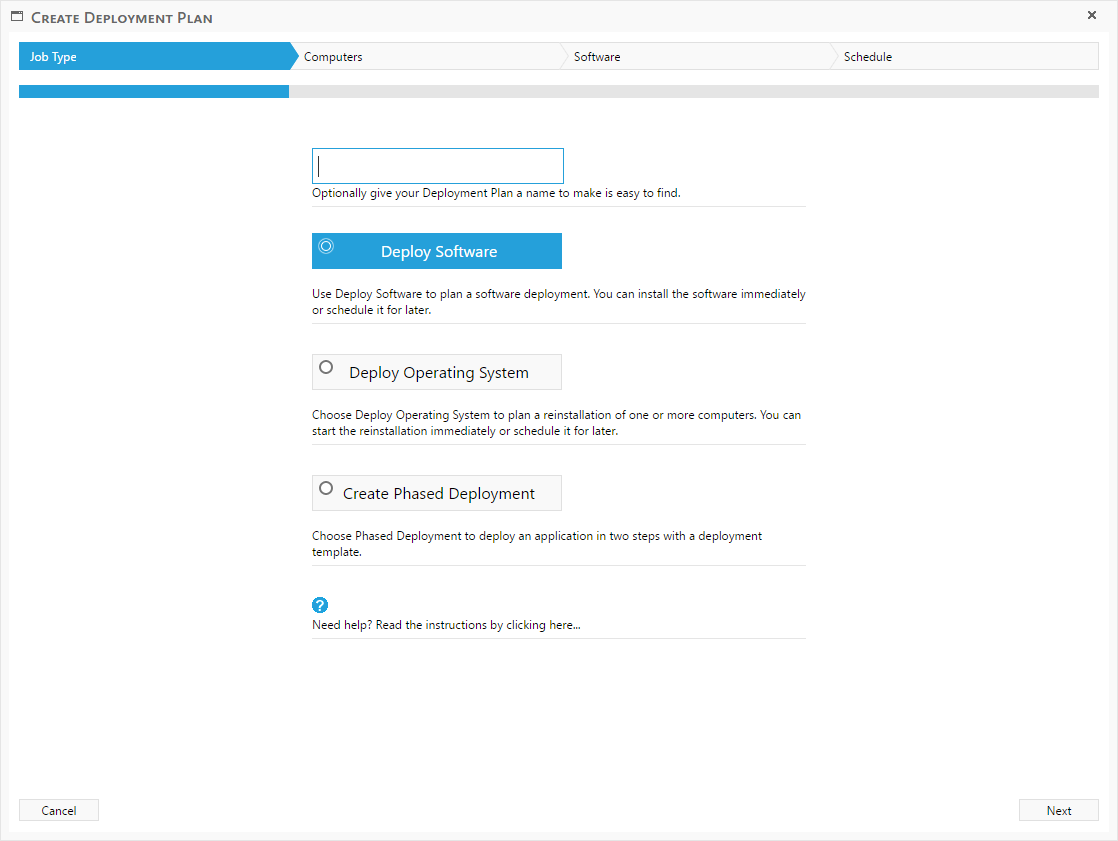
In the top of the window you see the steps you need to go through to complete the deployment. You can use this bar to navigate through the steps together with the Next and Previous buttons in the lower right corner.
The first tab, Job Type, lets you choose if you want to deploy software, deploy an operating system (reinstall a computer) or create a phased deployment.
You can give your job a name to make it easier to find later in the Deployment Manager.
The steps described in the rest of this manual are for deployments and operating systems. You can read about phased deployments here.
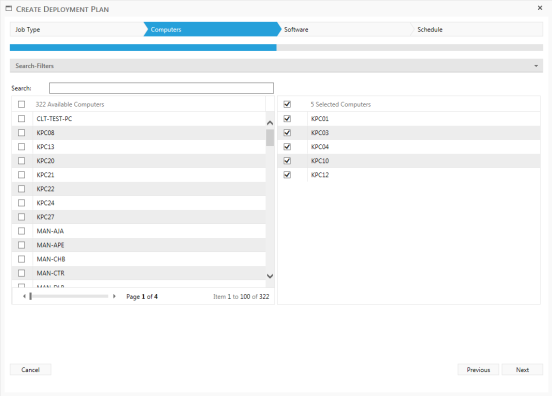
From the Computers tab, you can select the computers you wish to deploy to:

There are 2 lists in the Computers tab. The list to the left displays the available computers. You can use the Search bar to search for a computer name or name series.
Click on the checkbox next to each computer to select them.
Selected computers will show up in the list to the right.
Note that the Select All checkbox in the headers will only select 100 computers at a time.
Search Filters can be applied if you click on the “Search Filters” bar. It will open a display a list of filters:

- Filter by Collection will display all computers in a given collection.
- Filter by AD-Group will display all computers in a given AD-Group.
- Filter by OU will display all computers in a given Organizational Unit.
- Upload CSV-file allows you to upload a CSV file with a list of computer names or resource ids.
- Filter by WQL-Query will display all computers returned by a WQL query or Computer Group.
- Clear All Filters will reset all filters and display all available computers.
When you have selected your computers, the Computers tab will look like this:
The Software tab will look differently depending on whether you have chosen to deploy software or deploy an operating system.
If you have chosen to Deploy Software you will see a list of all available software:

Use the Search bar in the top to search for a program by its name.
The green button will install the program on the target computers where it is not already installed.
The red button will remove the program from the target computers where it is installed.
Selected programs will show up in the list to the right as seen in the screenshot to the right:

 |
If a program is already installed on some of the target computers, it will not get reinstalled. Nothing will happen and the Deployment Monitor will display the program as installed immediately. |
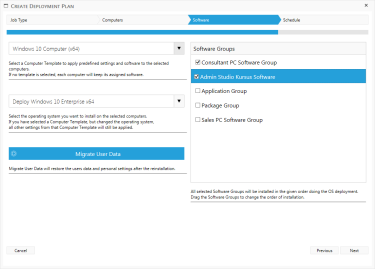
If you had chosen Deploy Operating System the Software tab would look like this:
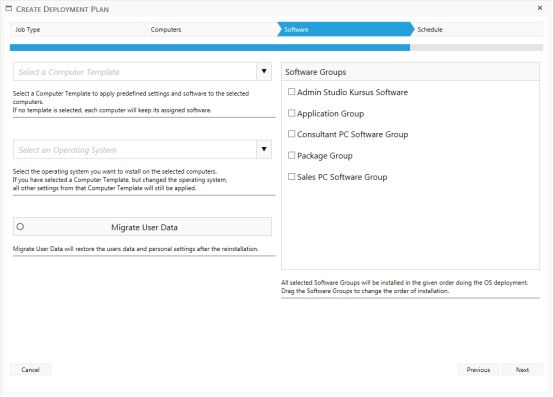
From here you can select a Computer Template or choose your operating system manually.
The Migrate User Data button will, if selected, restore the users personal settings and data to the computer after the reinstallation.
You can select the Software Groups you want to apply to the computer doing the operating system installation.
You can drag each Software Group to change the order they are installed in.
Once you are ready to reinstall the target computers the interface should look something like this:
The final tab, Schedule, lets you decide if you want to start the deployment immediately or create a schedule that will run later.
By default the “Run Immediately” option is selected. Click on the Finish button in the lower right corner to start the deployment.

If you want to create a schedule that runs the deployment later, choose the “Create a Schedule” option:
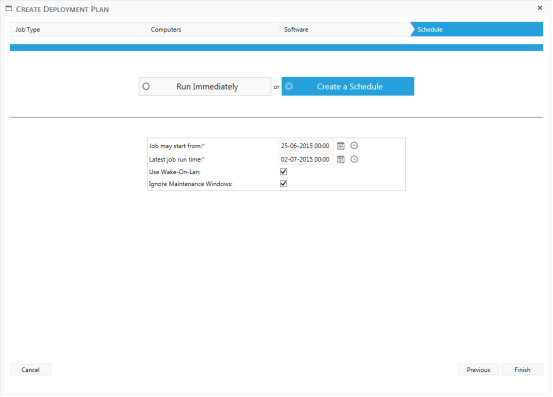
This will show a small box with some required fields.
You must specify when the deployment will start and its latest run time.
Chose “Wake-On-Lan” to automatically turn on the computer when the deployment starts.
Choose “Ignore Maintenance Windows” to ignore any maintenance windows and force the installation through.
Once your deployment is saved, it will show up from you list of deployments.
To see the status of your deployment, click on the View button.
The Deployment Monitor will open and show live data from your deployment. See the next chapter, Deployment Monitor, for a detailed description on how to see status for your deployments and how to fix failed deployments.