Basic Configuration before use
| Interfaces > Settings > Basic Configuration before use |
The site is now ready to start for the first time. Make sure you are logged in as a user who is a member of your administrator AD-Group, ”SWC_ADMIN_GROUP”.
 |
All configuration must be done from the server. The site must be accessed via locolhost in the browser. |
|
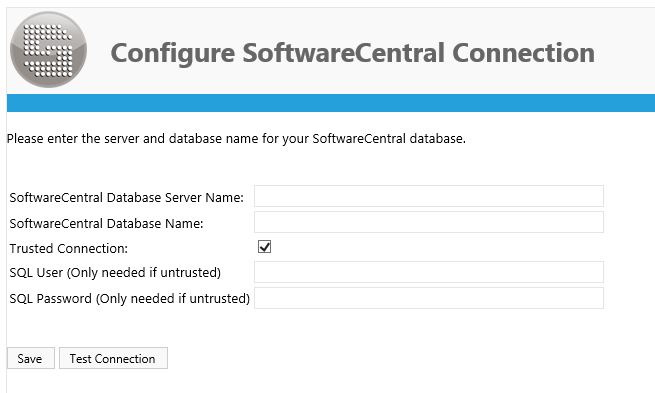
When entering the site for the first time, you will see this screen; this is for the SoftwareCentral database connection. Before saving, the connecting can be tested by clicking the Test Connection button.
|
|
|
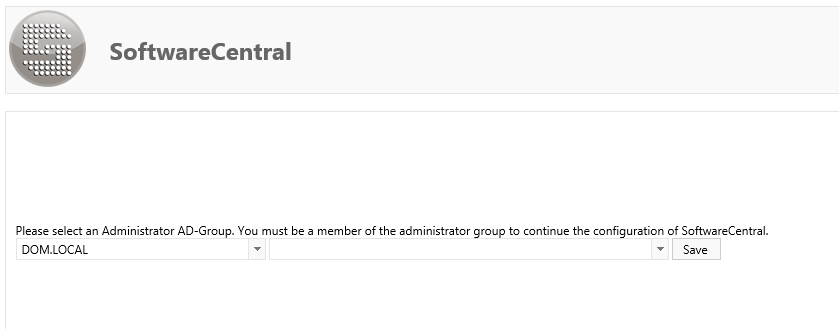
In the next step, select the correct domain and the administrator group, “SWC_ADMIN_GROUP”. Click save. You can only save the administrator group, if you are a member of it.
|
|
|
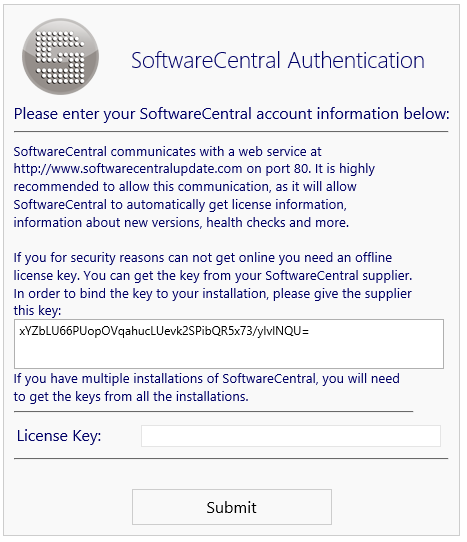
The next window will be the license information, here you need to add credentials given from your SoftwareCentral provider. You must give the installation a title, e.g.: “2016 Production Server”. Press Submit.
|
|
|
If the server hosting your SoftwareCentral installation does not have access to the internet, you will instead need an offline license key. The offline license key will be bound to your installation. To achieve this, a unique identifier from your installation is needed. This identifier is generated for your installation when you get prompted for the license key, by pressing the question mark as seen on the screen to the right. Provide this key to your SoftwareCentral provider, and an offline license key will be generated.
|
|
|
SoftwareCentral will now open. In the lower right corner a lot of notifications will appear with various error messages. Ignore those messages, they appear because SoftwareCentral isn’t configured yet. |
|
|
In the top menu, open “Settings” and select “Settings”:
|
|
|
Open the General settings tab, and select server configuration:
You must enter the Central Site Code (3), SCCM Server (4), SCCM Database Server (5) and Database Name (6). You must also enter the Application pool username (18) and password (19). Some of these fields may already be filled in if you entered the information during the installation.
Click “Save”.
View more about each setting here. |
|
|
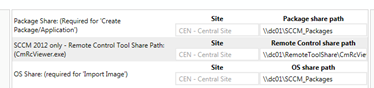
Open the SCCM tab and select Shares. You should now see a package share for each site. Fill them in and click save again. |
|
|
SoftwareCentral needs some defined collections and folders on the SCCM server. A user folder named “Software Distribution”. This folder will hold collections used for deploying applications to users. A device folder named “Software Distribution”. This folder will hold collections used for deploying applications to devices, and more device folder name “Software Distribution Packages”. This folder will hold collections used for deploying packages to devices.
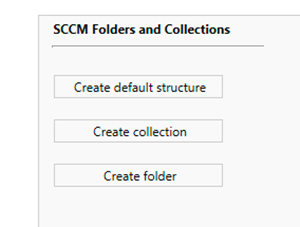
In SoftwareCentral, go to “Settings” and select “SCCM Folders and Collections”: Press create default structure, this will create the descripted folders. |
|
|
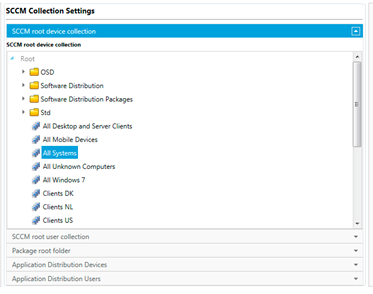
Set SCCM root device collection: This is the root collection. In early versions this was known as the “COLLROOT” collection. Select “All Systems”:
|
|
|
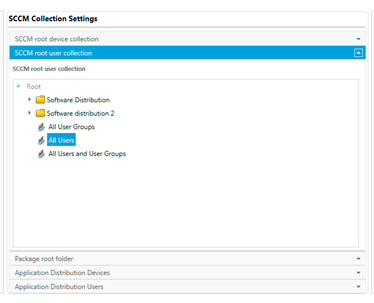
Select SCCM root user collection: Select “All Users”:
|
|
|
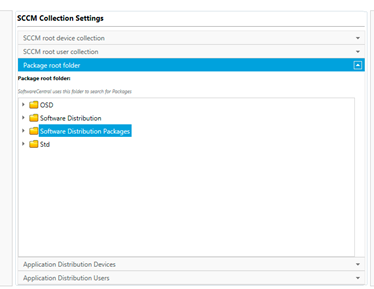
Select package root folder: Select the folder created earlier called “Software Distribution Packages”:
|
|
|
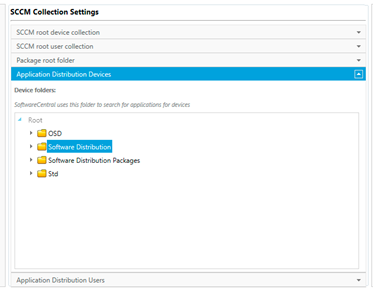
Select application Distribution Devices: This is the folder where applications install and uninstall device collections will be created. Select the folder “Software Distribution” created before:
|
|
|
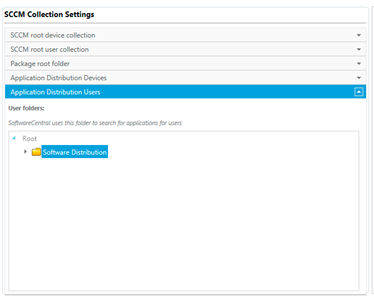
Select application Distribution Users:
This is the folder where applications install and uninstall user collections will be created. Select the folder “Software Distribution” created before:
|
|
|
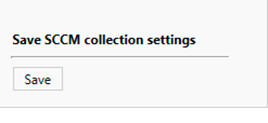
Now click “Save”. The basic settings needed for SoftwareCentral to run have now been completed.
|
|
SoftwareCentral is now installed and most of its functionalities are ready to use.
If you wish to connect SoftwareCentral to Intune, see the Intune Configuration chapter.
You can also go to the Getting Started chapter, to see read how to use SoftwareCentral.