
Scheduled Deployments
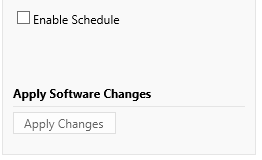
Manage Software can schedule a deployment for later. Just above the “Apply Changes” button there is a checkbox called “Enable Schedule”.
When you check it, a date-time picker will show up below it.
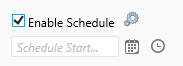
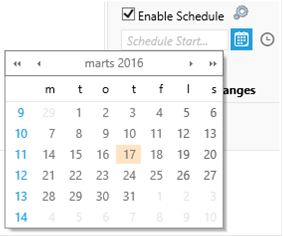
Click on the calendar-icon to select the date the deployment should start.
Today’s date is marked as yellow.
Click on the date where the deployment should start.
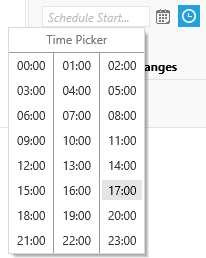
If you need to be more precise, you can set a start time to the hour by clicking on the clock icon:
The schedule is now set and the deployment is ready. Click on the “Apply Changes” button to apply the scheduled deployment.
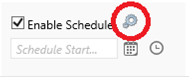
More advanced settings can be set for the schedule by clicking on the little settings-icon:
This will open a new window. From here you can give your scheduled deployment a name. This will make it easier to find in the Deployment Manager and the Edit Schedule interfaces.
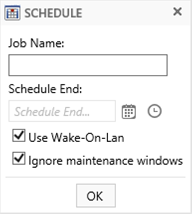
You can also define the latest run time for the schedule. This is by default 7 days after the start time.
You can disable wake-on-lan to turn on the computer if it is offline when the deployment starts. This is by default enabled.
You can also disable the ignore maintenance windows, which is also enabled by default.
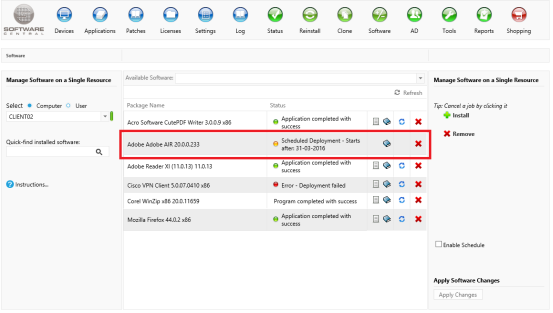
Scheduled deployments will show up in the assigned software grid, just as any other assigned program. They will be flagged with an orange status icon.
You can remove a scheduled deployment by clicking on the ”Remove” button and then on ”Apply Changes”.