Security roles
| Interfaces > Settings > Security roles |
This guide will provide information on how to create, edit and delete security roles inside SoftwareCentral. To find out what a security role is, see the configuration guide.
The security role interface can be accessed from the settings menu and then “Security Roles”.

 |
A security role can only edit and delete other roles with the same or lower access that the role itself. |
From the main security role interface, the security role wizard can be accessed by clicking “Add new security role” found in left side of the menu.
This interfaces provides an overview over all the security roles that have access to the SoftwareCentral console.

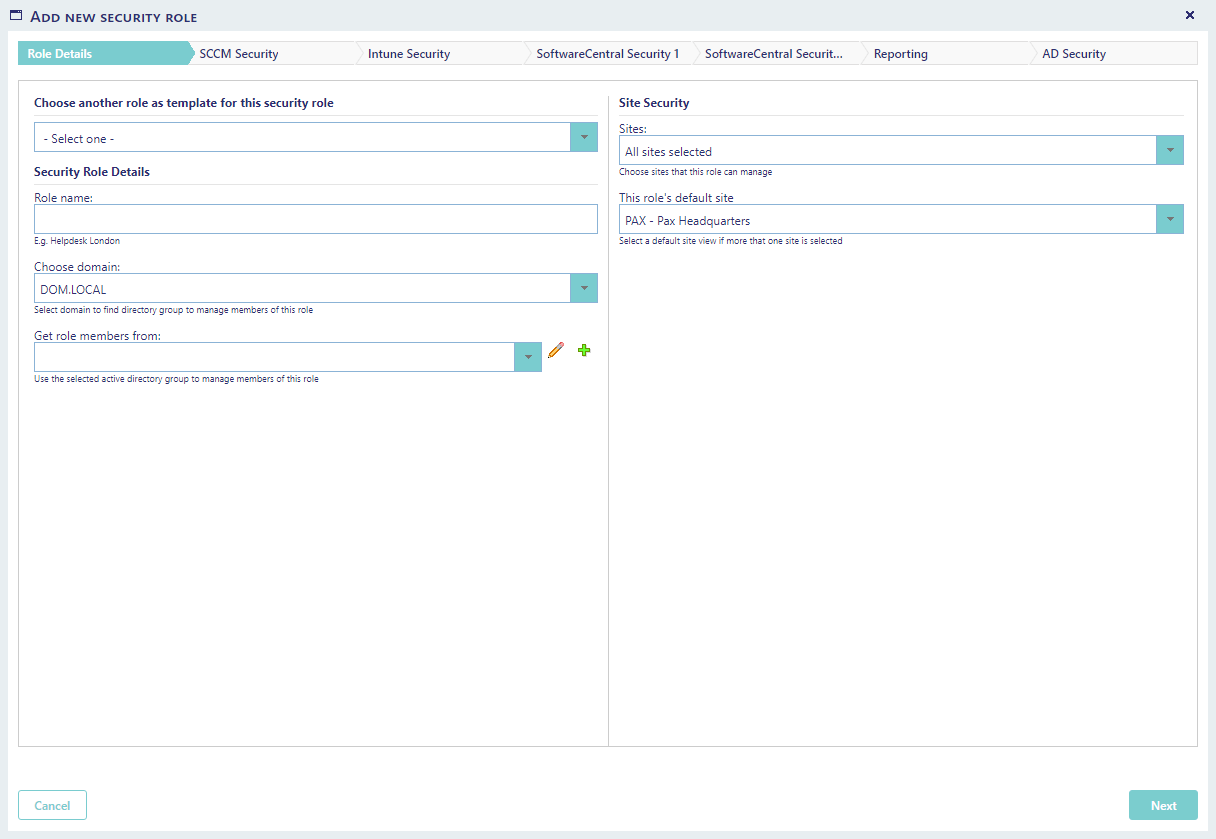
The security role wizard consists of 6-7 simple steps, and the first step is also the only step having mandatory fields, the other steps have optional settings where the different limitations are defined.
In this first step all detailed information about the role is specified, to complete this step, following needs to be done.
|
For easy configuration of a role, an existing role can be used as template, all settings from this role, except the name is copied. |
1) Specify a descriptive name for the new security role.
2) Select domain form where the active directory (AD) group for this role is located.
3) Select the AD group from which the security role will collect its members.
|
An active directory (AD) group for specific security roles should first be created and populated in the company’s AD and members of the group added. It will then be visible in the list of AD groups in SoftwareCentral. |
4) Specify which sites the members of the security role are allowed to see and operate in, if there only is one site this is automatically selected.
5) Choose a default site view if more than one site is selected - this is the site that will be selected when users log in.
6) Press next.
In the second step, all security settings concerning the SCCM is configured for the role. There are three different settings.
1) Collections that will be available to this security role. The collections are used to limit which users and devices a security role is allowed to operate on.
|
A security role can only see users and devices which are members of the selected collections. |
2) SCCM queries: Select the SCCM queries this role is allowed to use, queries can be specified for each site the role is allowed to operate on.
a) Set the Maximum number of resources this role can work on, to remove the risk of a user making a mistake on to many devices / users in the same operation.
3) OS task sequences: Select which OS task sequences this role is allowed to use when importing and reinstalling computers.
Note: If the “Have always rights to all OS task sequences” is checked, the role don’t need to be updated if new OS task sequences is imported to your SCCM environment.

In this step you define the security settings for Intune related operations.
|
This step is only visible if you have connected SoftwareCentral to your Intune tenant. |
Choose which Intune tenants the users are allowed to operate on.
Select a device group under Intune Devices in order for users to see and manage devices.
Select a user group under Intune Users in order for users to see and manage users.
Select a group under Intune Groups in order for users to see and manage groups.
The available applications are controlled via Package Security Groups under "SoftwareCentral Security 1".

In this step, security settings for SoftwareCentral are configured for the role. There are two different settings:
1) Menu buttons: Specify which menu buttons will be available to this security role. Under each main menu button, submenu buttons can be found and under these interface limitation buttons can be found, so a role only can access a limited part of an interface.
a. Note: SoftwareCentral regularly adds new interfaces and features, and these are not visible for a role until the role is updated with these new functionalities. If a role needs full access at all time to all submenu buttons and all interface limitations buttons of all selected main menu buttons, the “Have rights to all submenu buttons of selected buttons” can be checked.
2) Package security groups: Specify what package security groups that will be available for this security role. Assign Packages to Security Groups can be used to limit which packages, applications and software groups a security role can see.

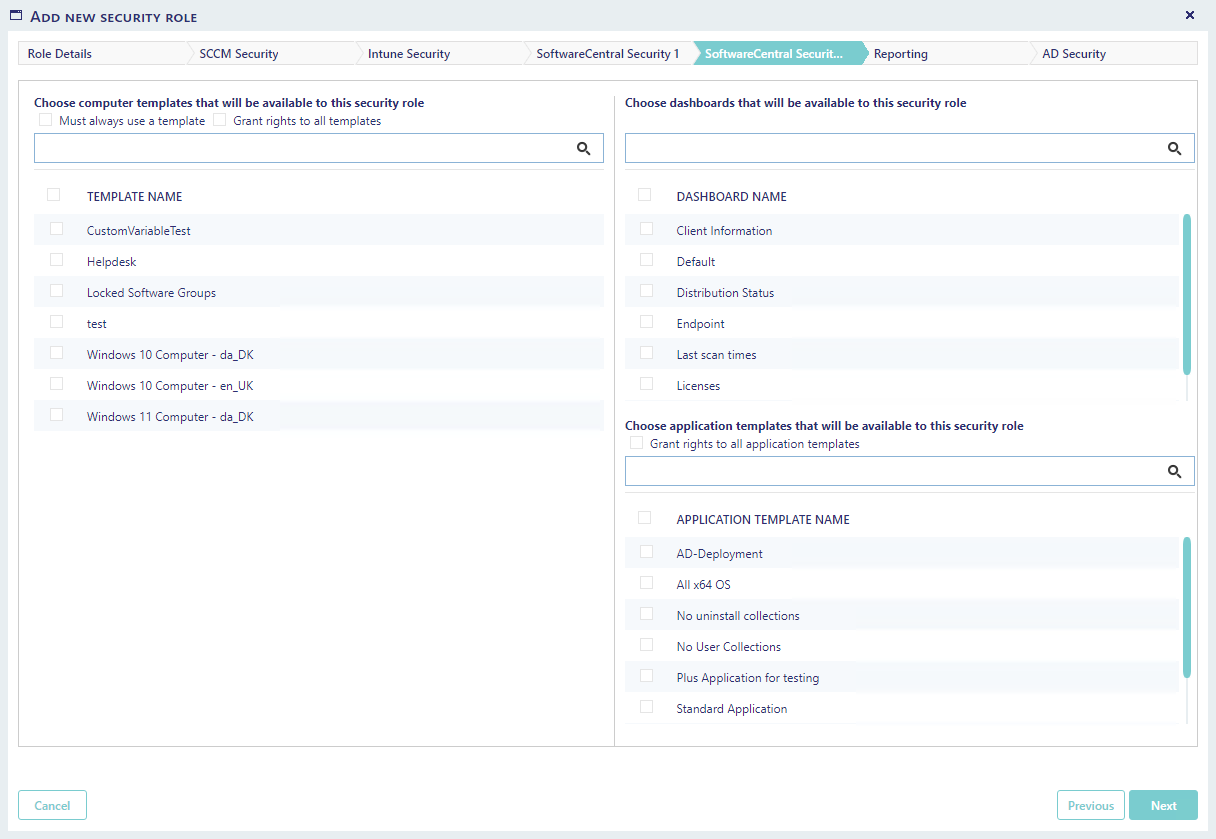
In this step, additional security settings for SoftwareCentral are configured for the role.
1) Computer templates: Specify which computer templates that will be available for this security role. There are two extra settings for this part.
a. Must always use a template, make sure that the role must use a template when importing a computer.
b. Grant rights to all templates, gives the role access to all templates at all time.
2) Dashboards: Choose the dashboards that will be available from the Dashboard interface.
3) Application Templates: Select the Application Templates that will be available to this security role.
|
This step is only available, if the reporting interface has been configured. See SCCM Reporting Setup. |
In this step, all security settings concerning reports is configured for the role. This will limit the reports the role can see in the interface SCCM reports.

In this step, all security settings concerning the Active Directory is configured for the role.
As default all roles have access to all domains, this can be turned off by adding organizational units.
An organizational unit will limit which OU’s will be present in the OU dropdown, when importing computers.
Organizational units also limit which objects the Active Directory module can access for the given security role.
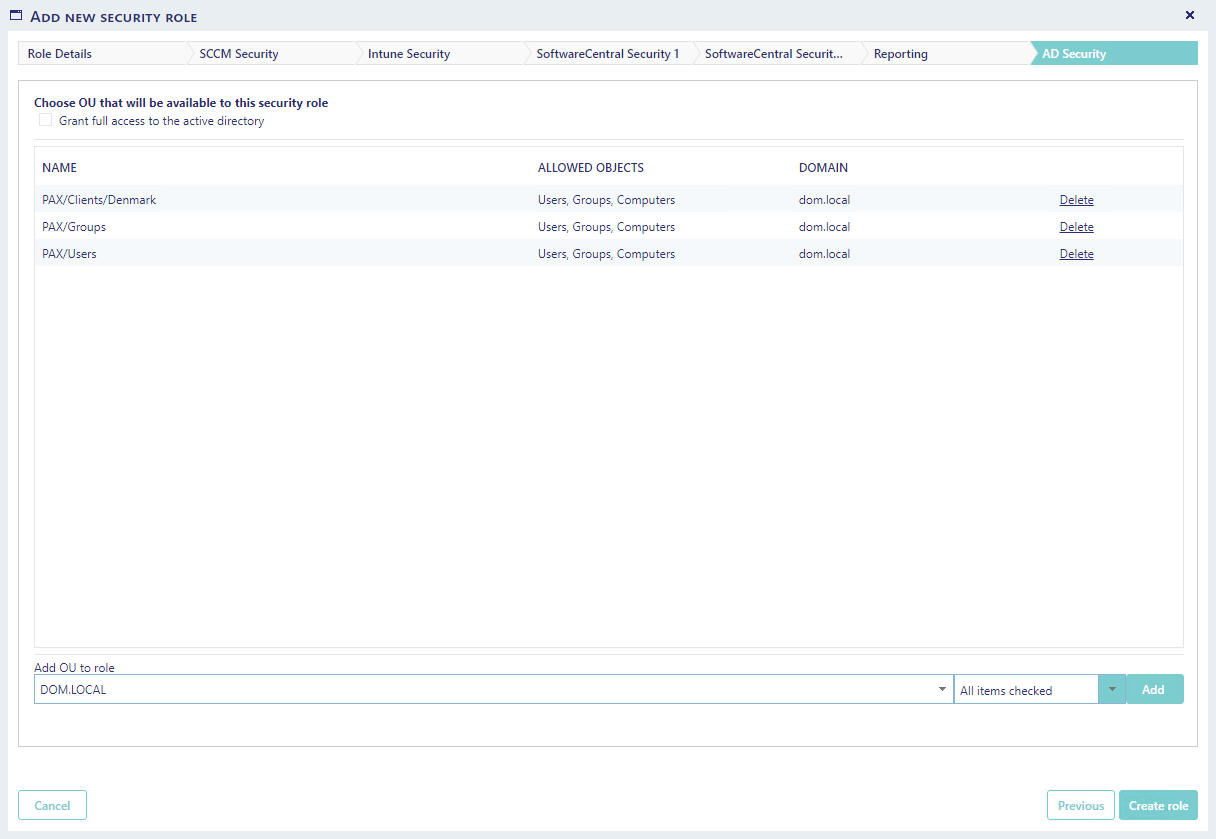
Use the type drop-down box to determine which objects the user is allowed to manage:

For editing an existing security role, press “Edit” in the main interface, on the role that’s need to be updated.
The same interface as in create security role will appear, and for more detailed information on what the different settings means, please see the Create Role part of this guide.
Note: If there is no edit button on the role that’s need to be updated, the used role either have lower access than the role that’s need update, or the role doesn’t have access at all to edit other roles.
For deleting an existing security role, press “Delete” in the main interface as seen on figure 2 on the role that’s need to be updated.
A warning message will appear, and the role is first deleted if the warning is accepted.
Note: If there is no delete button on the role that’s need to be updated, the used role either have lower access than the role that’s need update, or the role doesn’t have access at all to delete other roles.
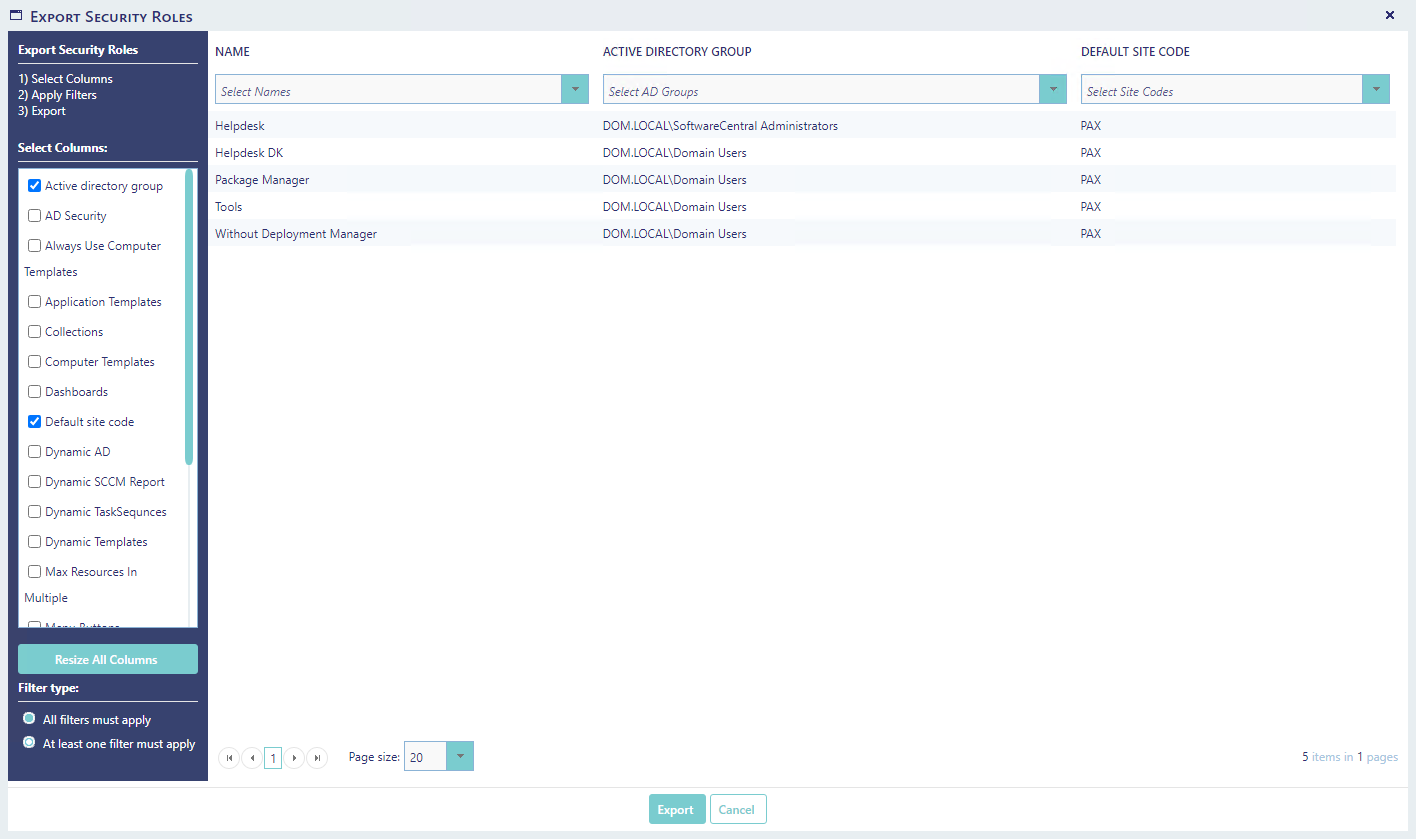
From the Security Roles interface there is an export button in the left menu.
This will open a new window, where you can choose which settings to export as a CSV file. You can from the Settings menu choose which columns will be pre-selected.